Configuring a Custom Domain for Your Enter Project
Learn how to configure a custom domain for your project in Enter. This comprehensive guide covers the entire process, from purchasing a domain (using services like AWS, Google Cloud, etc.) to adding the domain in Enter, and finally, updating the CNAME record to complete the DNS configuration. Give your project its professional branded internet asset!
A domain name is a very important asset for a brand's presence on the internet. You might remember the search engine's input box, but when you think of a search engine, it's not the HTML element that comes to mind, but Google. Today, I will teach you how to configure a custom domain for your project in Enter.
Buy Your Domains
Before configuring your domain, you need to purchase your own domain name. Currently, there are many established domain service providers on the market, such as AWS, Google Cloud Platform, Azure, CloudFlare, GoDaddy, etc.. You can choose any of the service providers above and follow these steps to get your exclusive domain name:
- Go to the homepage of the domain service provider's platform and register an account.
- Find the Domain page.
- Search for a domain, such as xxx.com or xxx.ai.
- Select a suitable one and place an order to purchase it.
- Done.
If you are currently configuring a domain, it is recommended not to close the domain service provider's page, as you will need to return to it in the Add your domain name in Enter section.
Add Your Domain Name in Enter
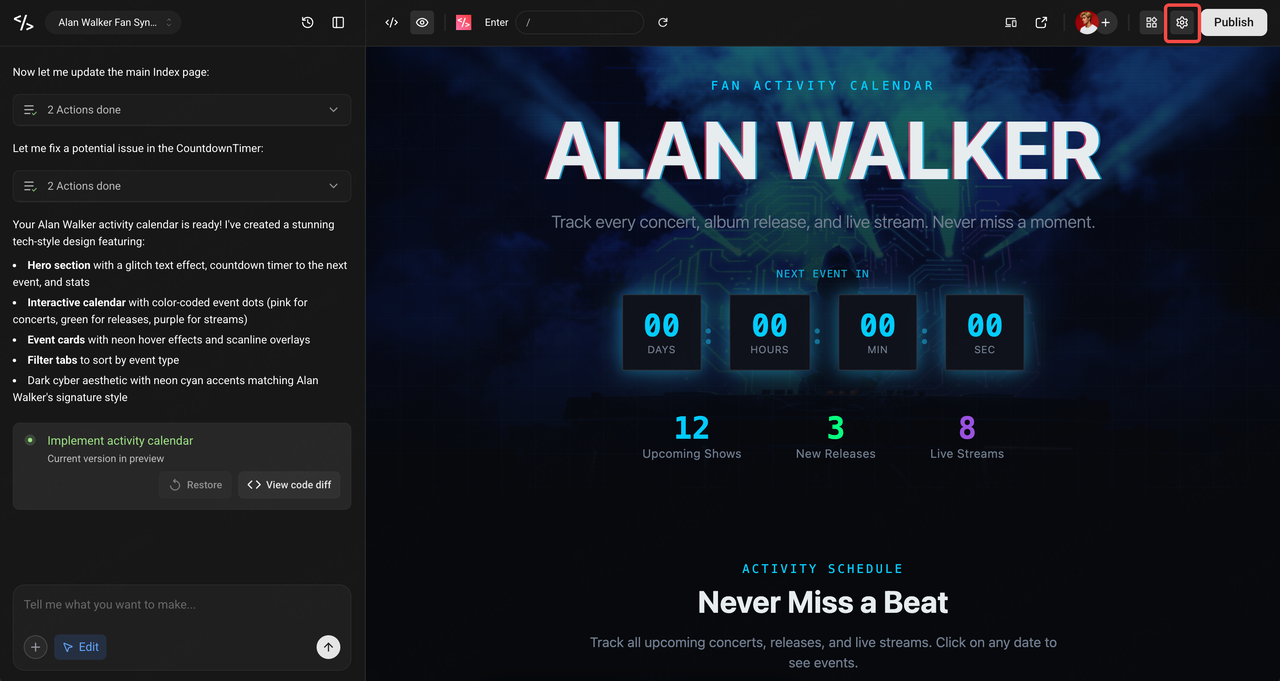
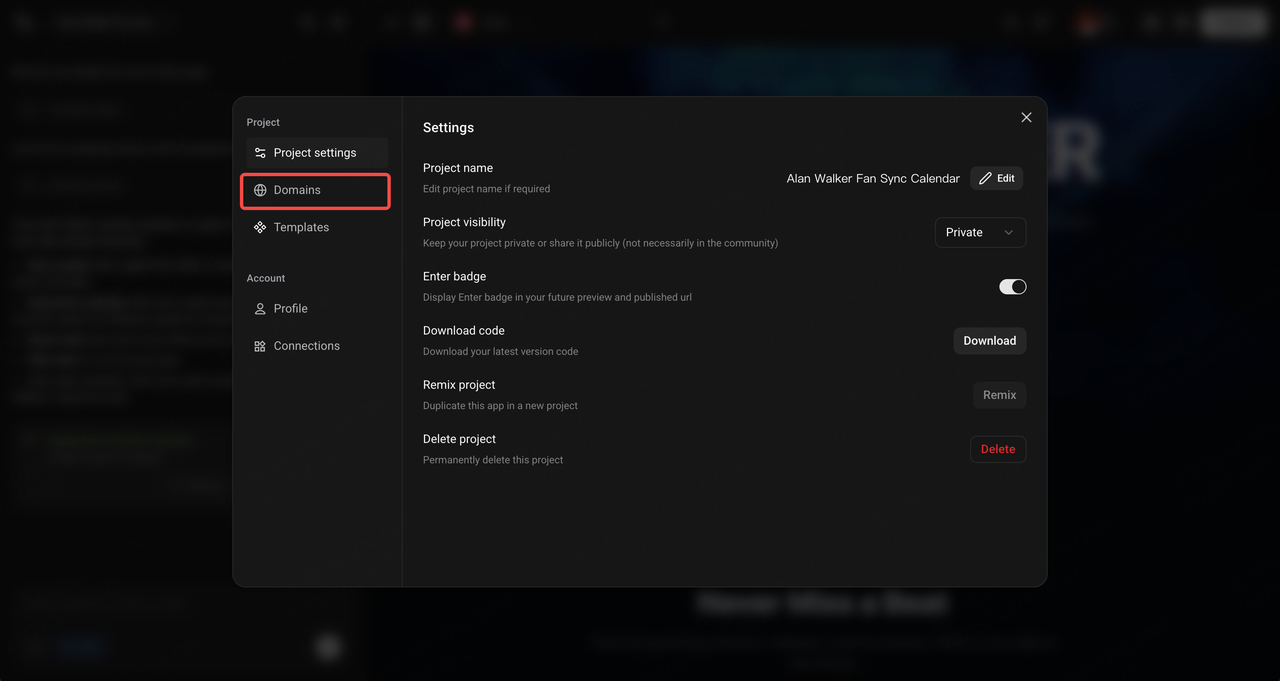
Open your project and click the Settings icon in the upper right corner.
Click Domains.
- If your project has never been published, Enter will kindly prompt you to publish it.
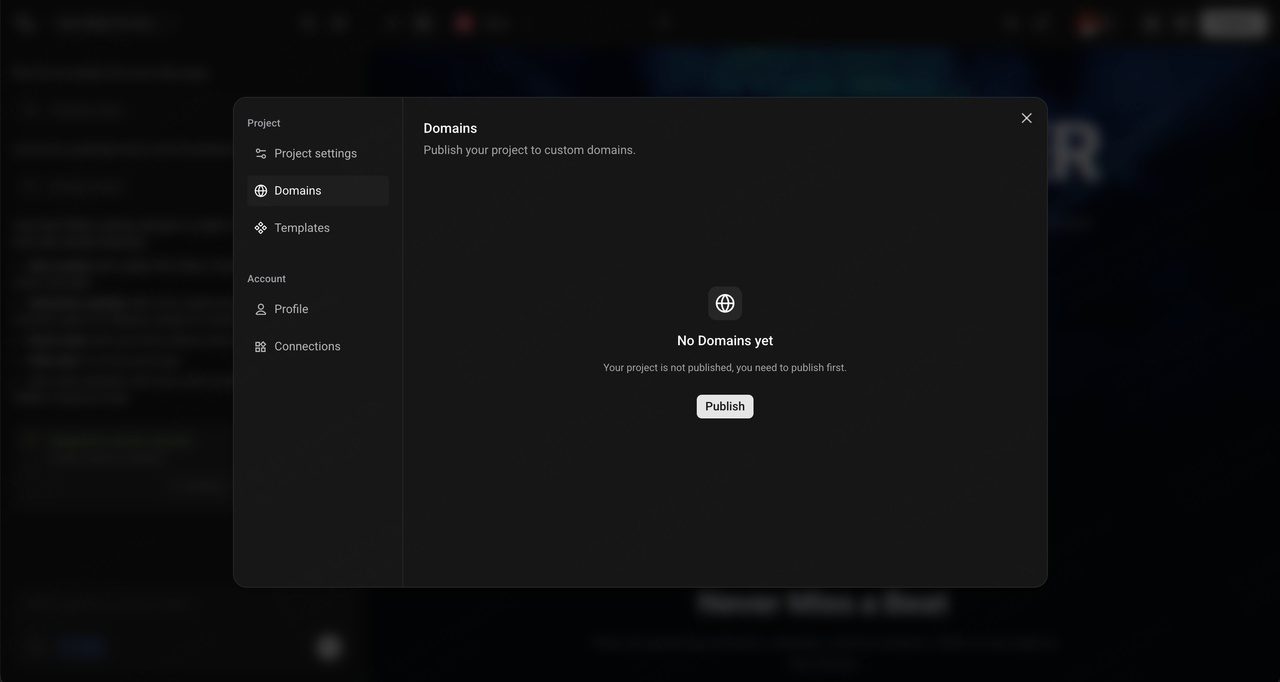
- After completing the first publication, return to Project Settings - Domains, and click Add Custom Domain.
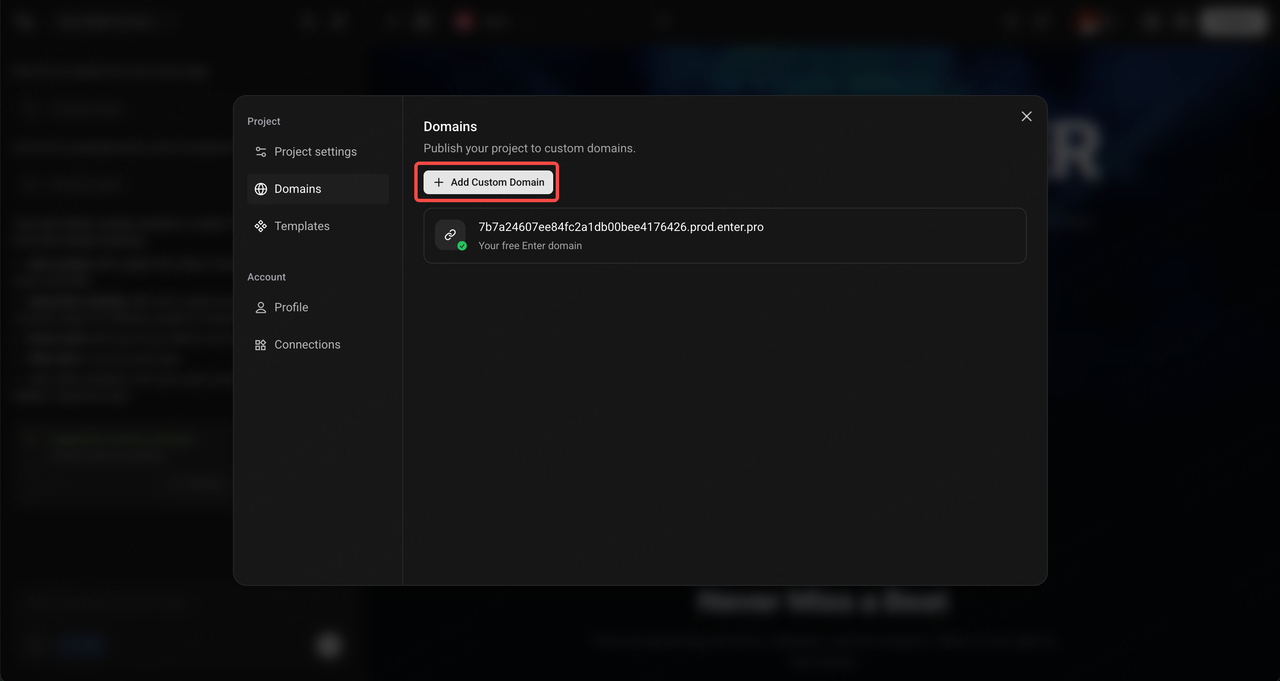
- Fill in your domain name as required. Note: Currently, Enter does not yet support two-segment top-level domains like xxx.com, but we will support them in the future.

- Click Confirm.
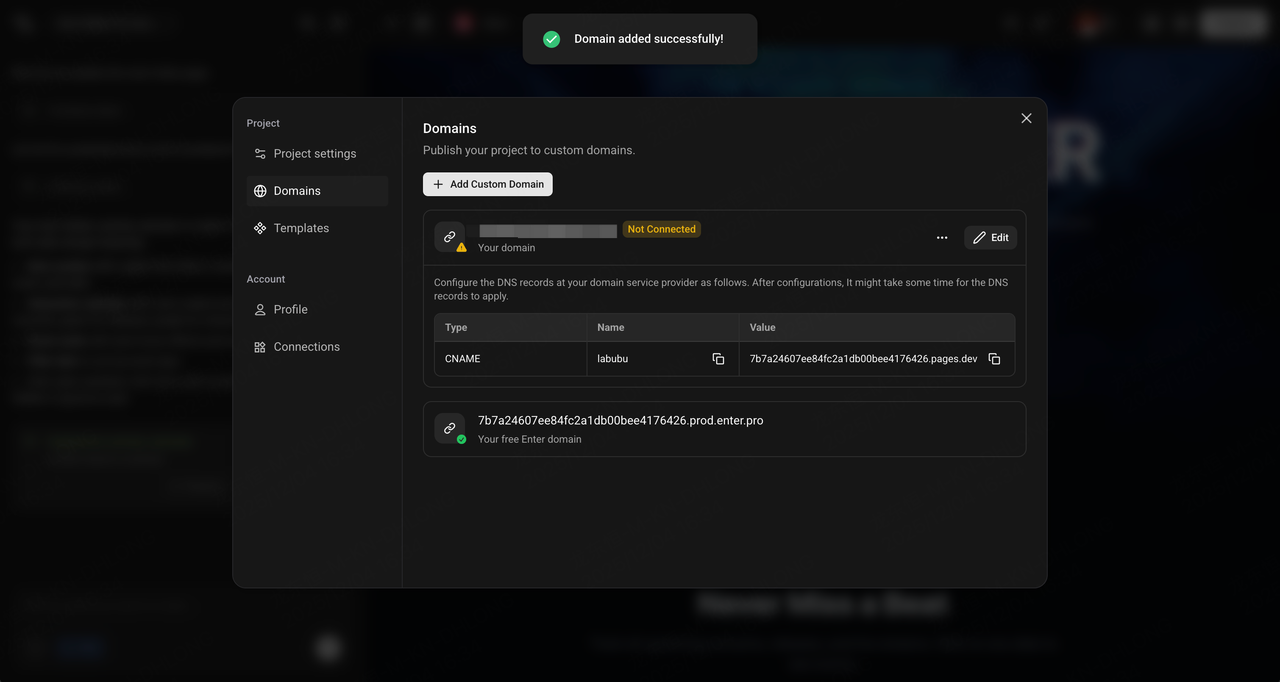
- The list will verify the DNS resolution status. If it is Not Connected, it will provide a friendly prompt on how to complete the configuration. At this point, you need to scroll down to the next section to update your DNS settings.
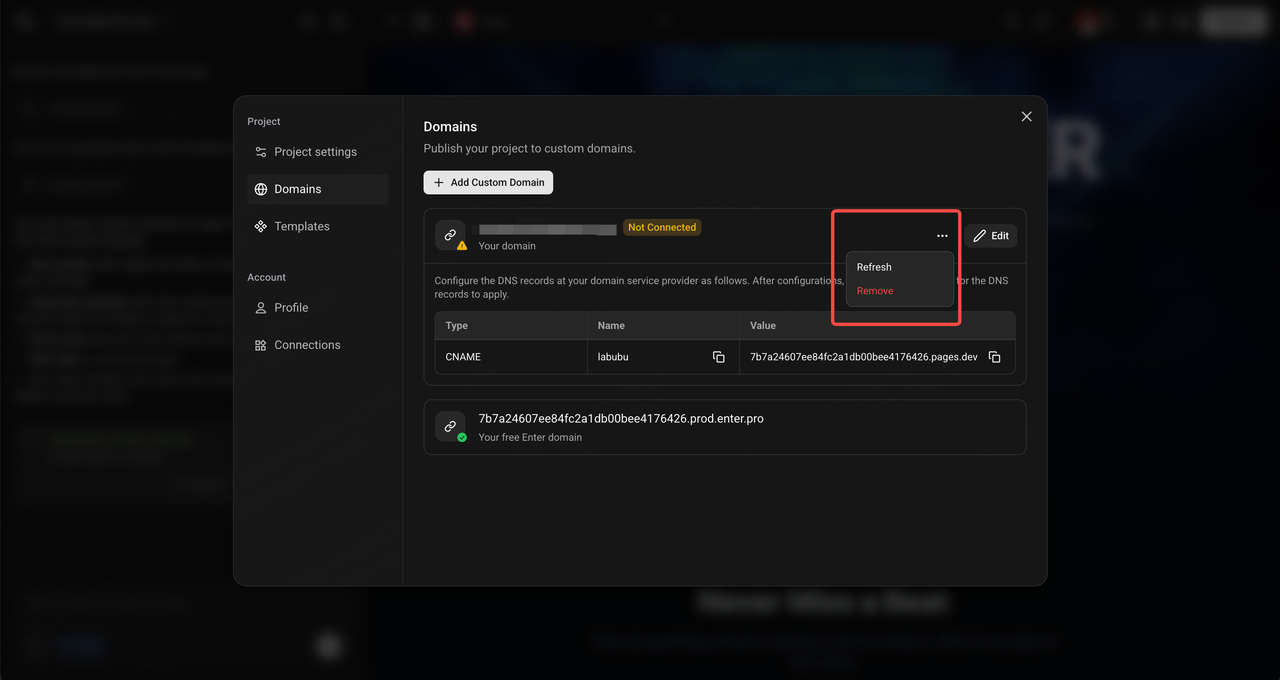
- After the configuration is complete, click Refresh in the More button to check if the DNS configuration has taken effect.
- If the configuration is successful, the status of the newly added Custom Domain will display as a green Connected.
Update your DNS Settigns
After you have finished adding the Domain, do not close the Enter tab. Follow these steps to point your domain configuration to Enter:
- Open a new tab and log in to your account with the domain service provider where you purchased the domain.
- Find the module for managing the domain's DNS configuration.
- Add a new CNAME record.
- Click Save. DNS resolution takes some time to take effect, usually a few minutes.
- Return to the Enter tab and periodically click Refresh for the domain to check the connection status.
If you cannot find the DNS configuration or are unsure how to create a record, please contact your domain service provider or our Enter service team.