Level Up Your App: Connecting Supabase in Enter.pro
Quickly connect and use Supabase in Enter.pro! This tutorial details both connection methods—via chat and the integration icon—and guides you on setting tool permissions, giving your Enter project powerful PostgreSQL data management capabilities.
Hello everyone! How has your coding experience been with Enter.pro lately? Today, I’m going to share how to use Supabase within Enter.pro, which is essential when you want to build an application powered by real data.
What is Supabase?
🚀 Supabase is an open-source Backend as a Service (BaaS) platform, often referred to as 'the open-source Firebase alternative.' Simply put, once you've written your frontend code in Enter.pro, you need a place to store your application's real data (like user lists, post content, etc.). Supabase is the all-in-one platform that helps you solve your backend challenges. At its core is the powerful PostgreSQL database, and it automatically provides you with:
- Database: A stable and reliable PostgreSQL database.
- Instant APIs: Once the database is set up, RESTful API endpoints are automatically generated, with no manual coding required.
- Authentication: Quickly implement user registration and login features.
- Storage: Helps you store assets like images and files.
- Realtime: Easily implement real-time data updates and synchronization.
Why Choose Supabase? (Especially for New Users)
Supabase's greatest advantages lie in its high efficiency and developer-friendliness:
- Rapid Development: It handles the complex backend infrastructure, allowing you to focus 90% of your energy on the Enter.pro application interface and core logic.
- Powerful Core: Built on the enterprise-grade PostgreSQL database, which is recognized industry-wide for its stability and powerful features.
- New User Friendly (Key Point!): Supabase offers a very generous Free Cloud Service Tier. Whether for personal projects, learning, or simple applications, its free allowance is more than enough, letting you start your data-driven application development journey at zero cost.
💡 For more detailed feature introductions and pricing information, feel free to visit Supabase.
Register and Create a Supabase Project
- Open the Supabase and complete your account registration.
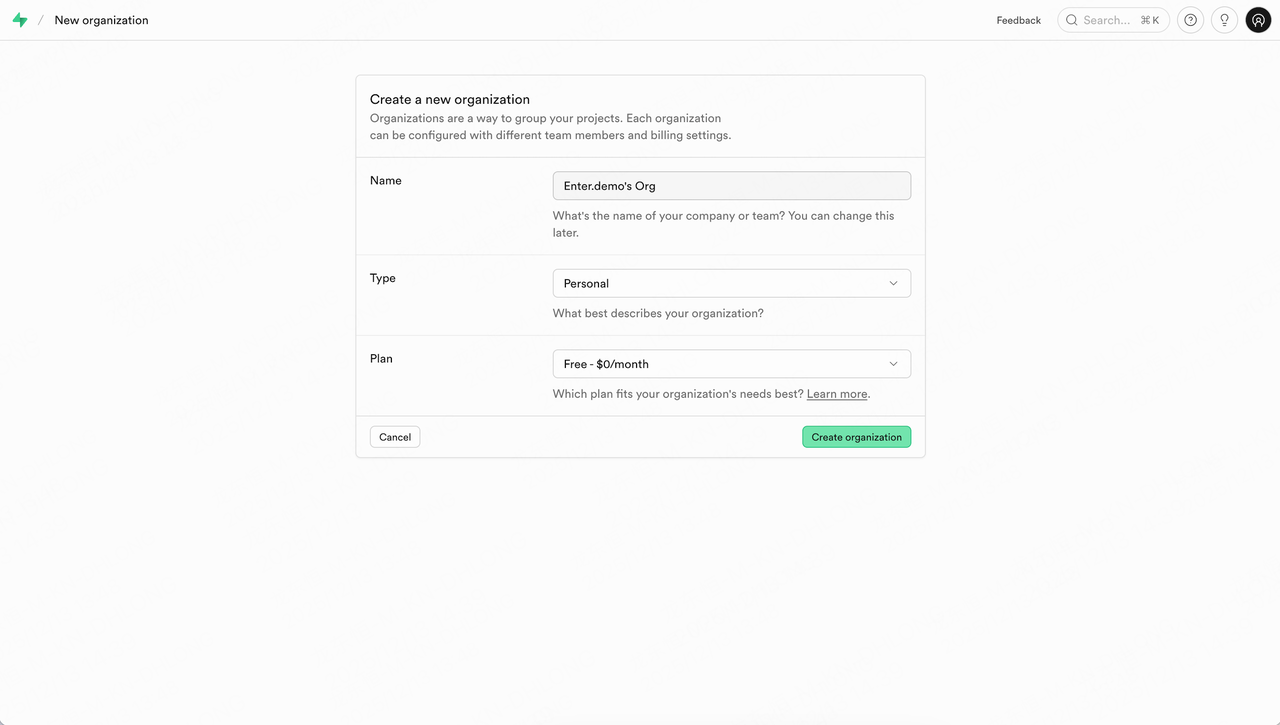
- After successful registration, create your Organization.
- Next, create your first Supabase Project. Remember to select the appropriate Region based on the location of your service users.
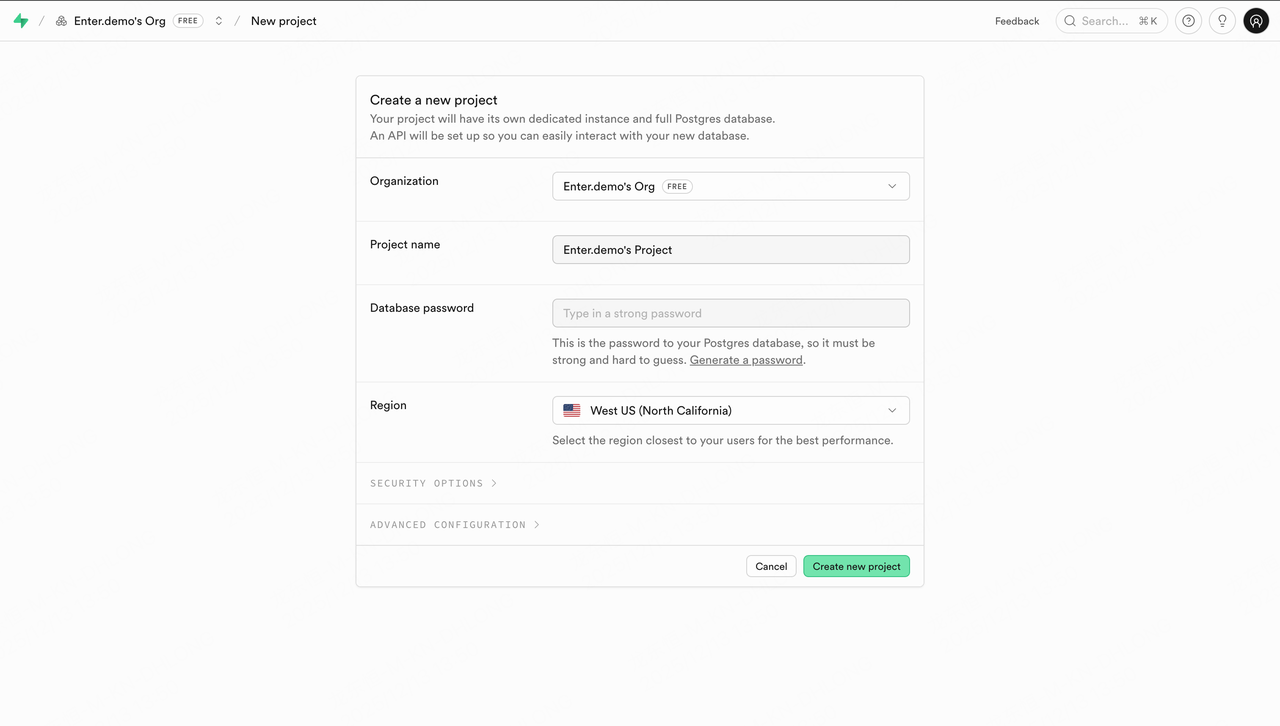
Once created, the page will automatically enter the Project Dashboard.
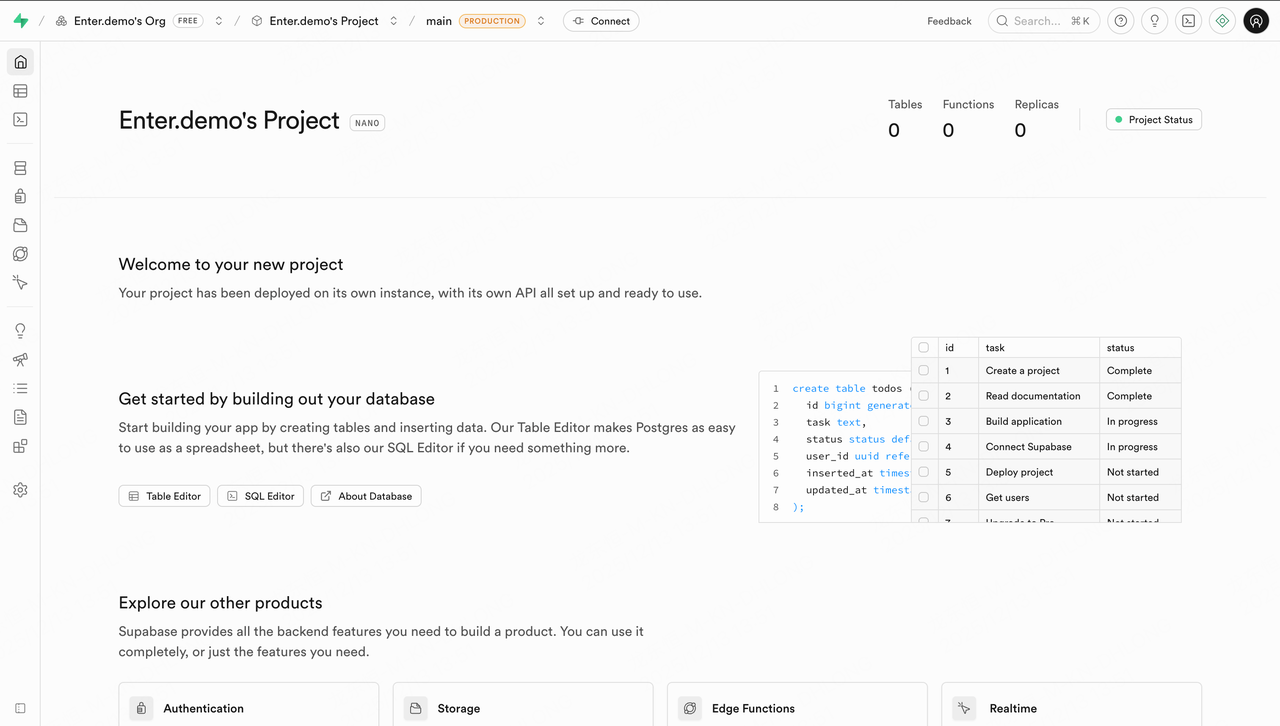
Now we need to head over to your Enter Project.
Connecting Supabase in Enter
There are two methods to connect Supabase in Enter: the first is through the Chat function, and the second is manually via the Integrations function.
- Enter any Enter Project.
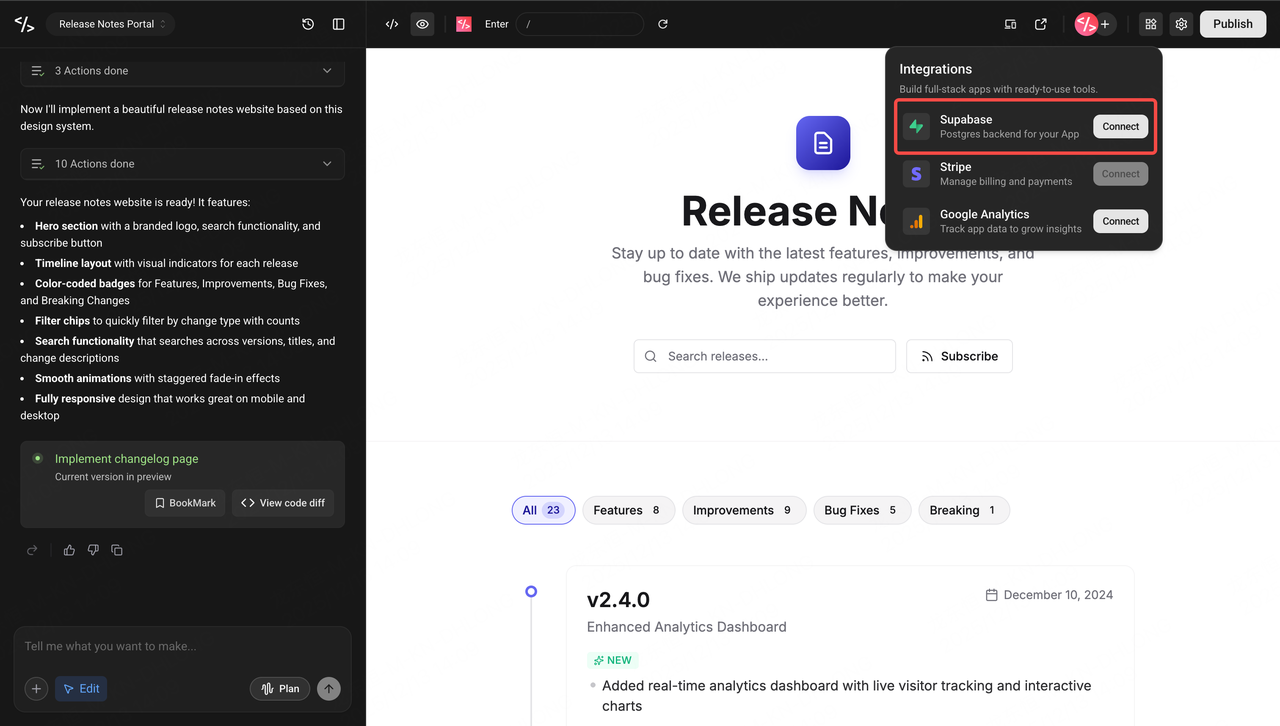
- Start Connection: Input a message related to "Connect Supabase" (e.g., "Connect Supabase").
- The Connect Supabase Card will appear in the Chat Panel; click the Connect button.
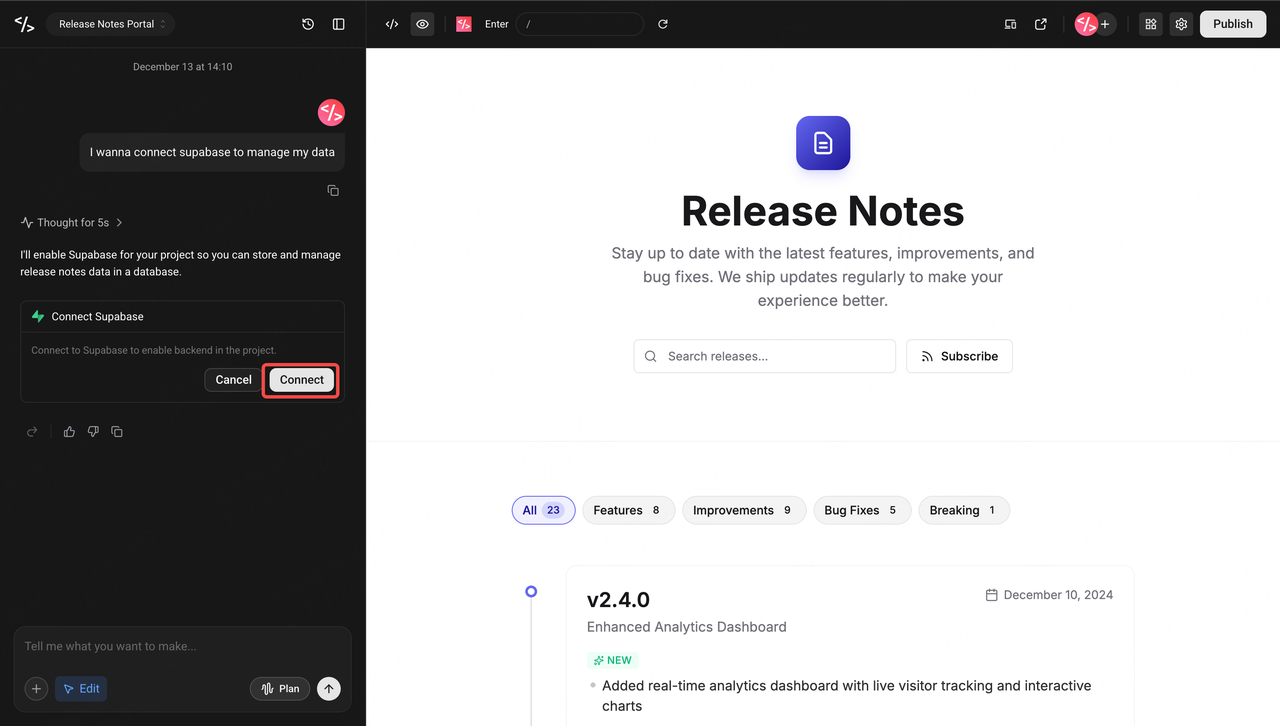
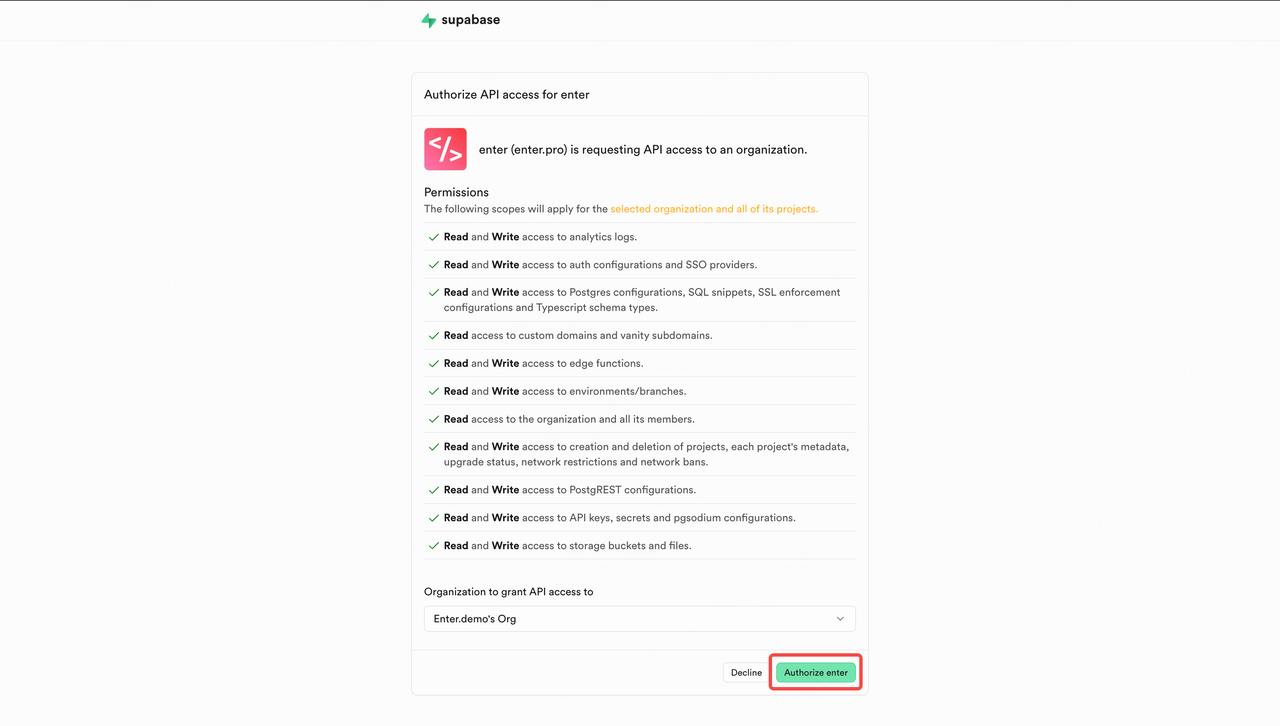
- Initial Authorization: If this is your first time connecting to Supabase, please follow the on-screen instructions step-by-step to complete the Organization Authorization.
- Select Project: After receiving the Org Authorization, select the project you wish to connect in the pop-up window, and click Connect.
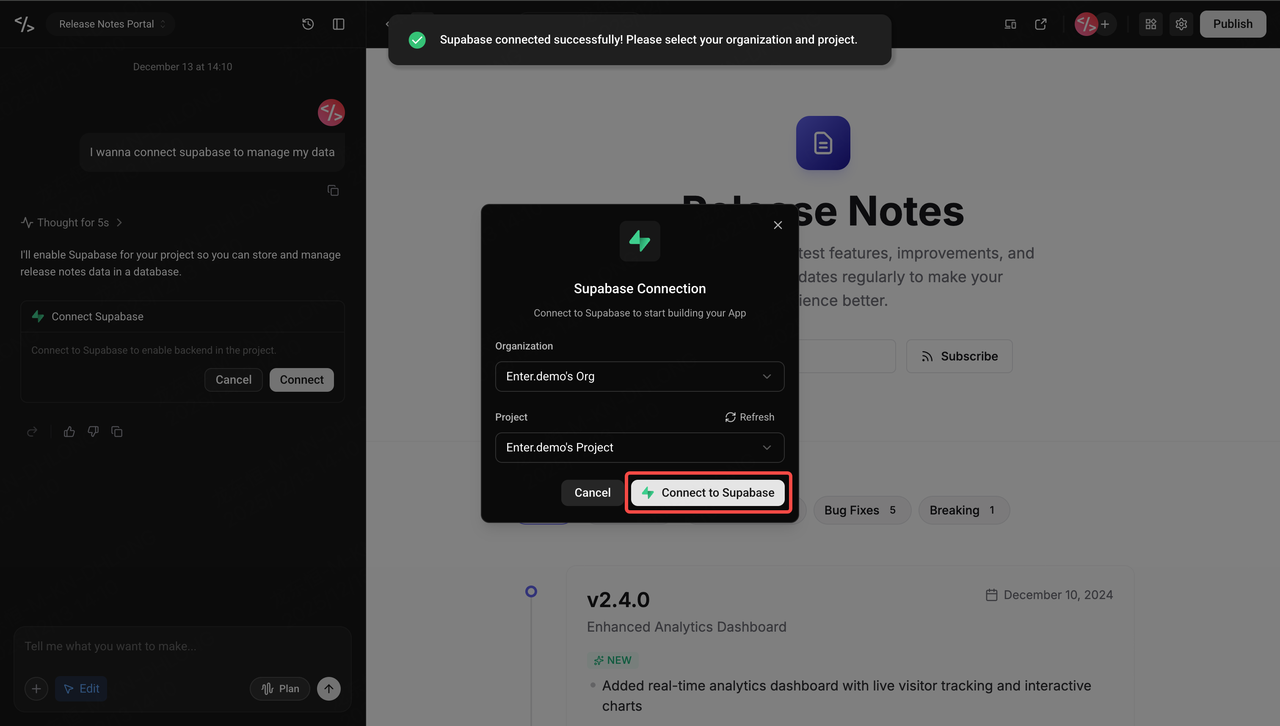
- Finish: Wait a few seconds, and the process will be complete.
- Note on Method Two: The second method is also very simple: click the Integration Icon in the top-right corner of the page and repeat steps 4-6.
Using Supabase in Enter
Once the connection is established, you can perform your desired operations in Enter through conversations/dialogue. Considering that Supabase is related to application data management, Enter provides permission management for several tools. You can choose between the more free-flowing Always Allow and the more secure Ask Everytime, based on your needs.
- Click the Settings button in the top-right corner of the page.
- Click Connections on the left, and then expand Supabase Advance.
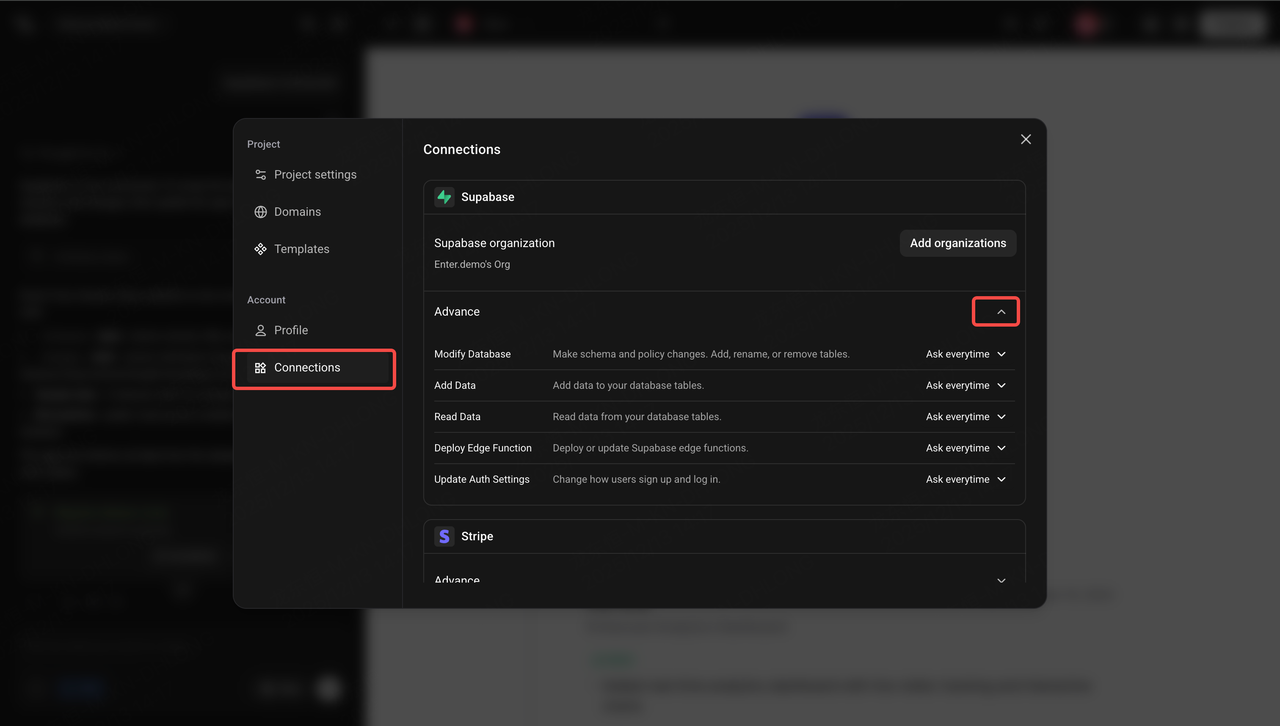
- Adjust the command settings for different tools (permissions).
- After making your adjustments, subsequent tool actions will automatically execute according to your configuration.
Viewing Supabase Data
Once connected, you can view and manage the data Enter has created for your application directly in Supabase.
- Return to Supabase and navigate to the page for your associated project.
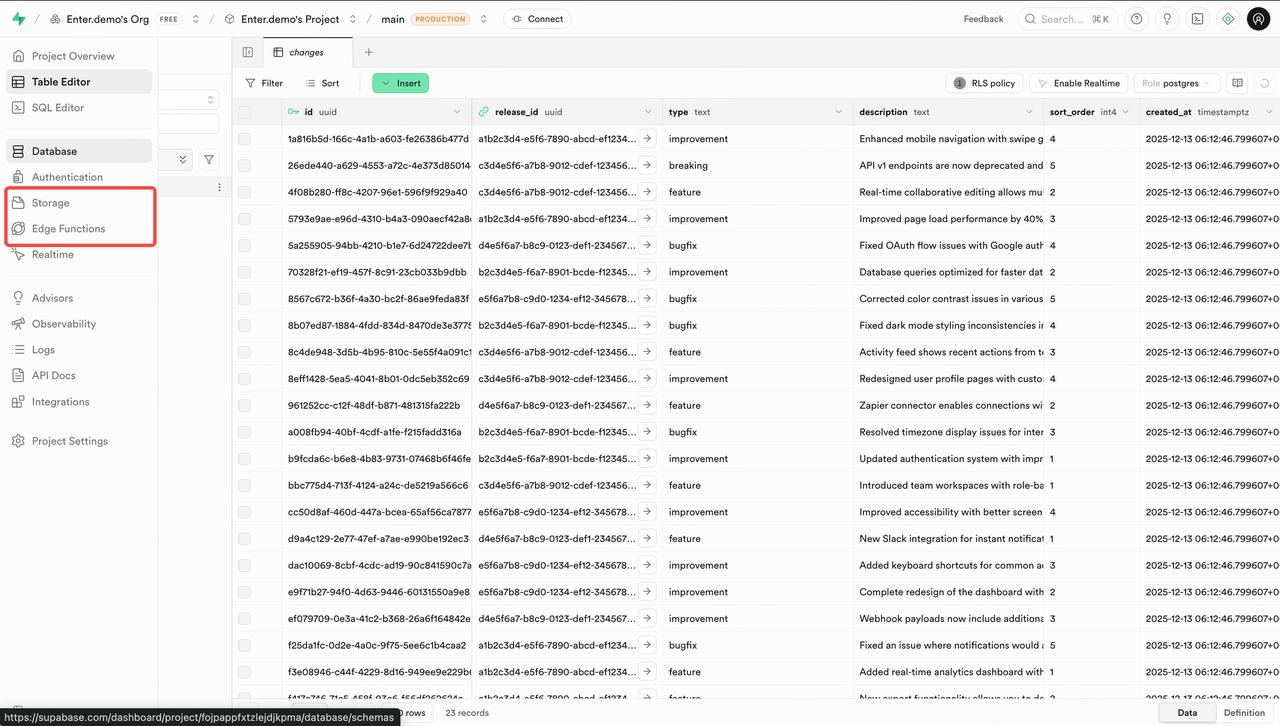
- Click Table Editor on the left sidebar.
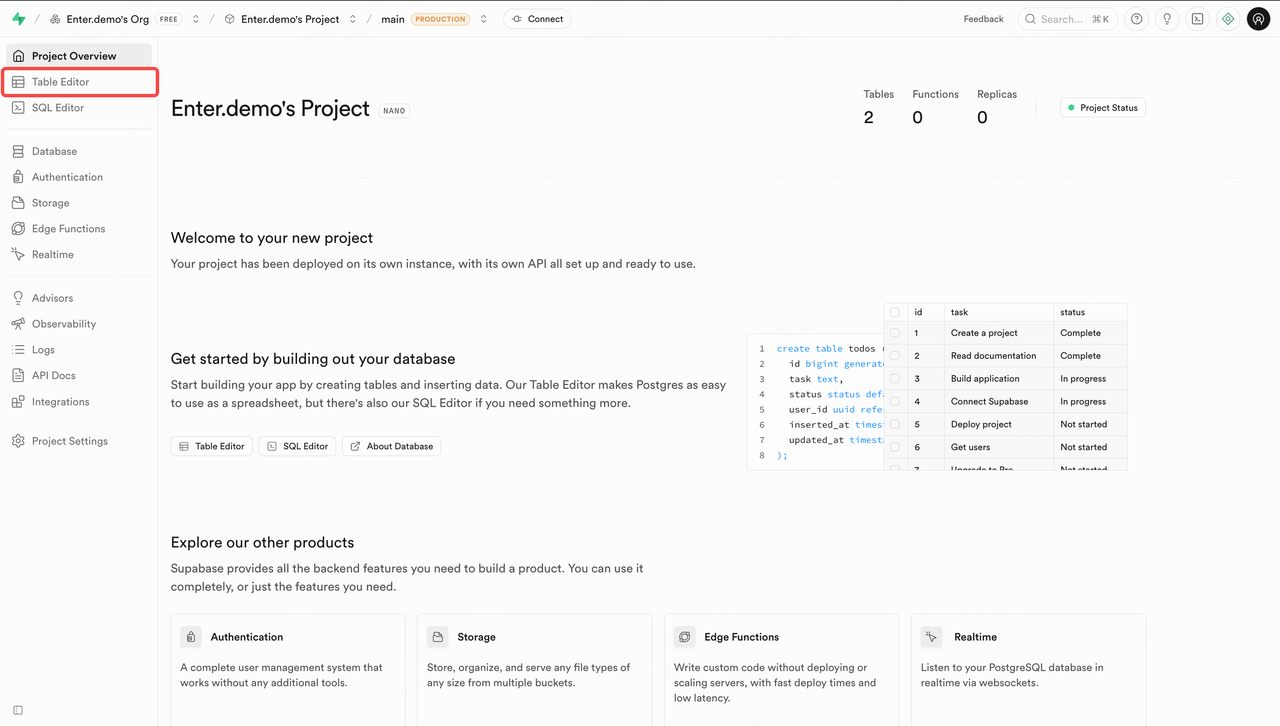
- The Table Editor will display all the tables and their data that Enter created for your application.

- The Storage and Edge Function sections on the left correspond to files uploaded by users in your application and the backend functions created by Enter, respectively.
Disconnecting Supabase
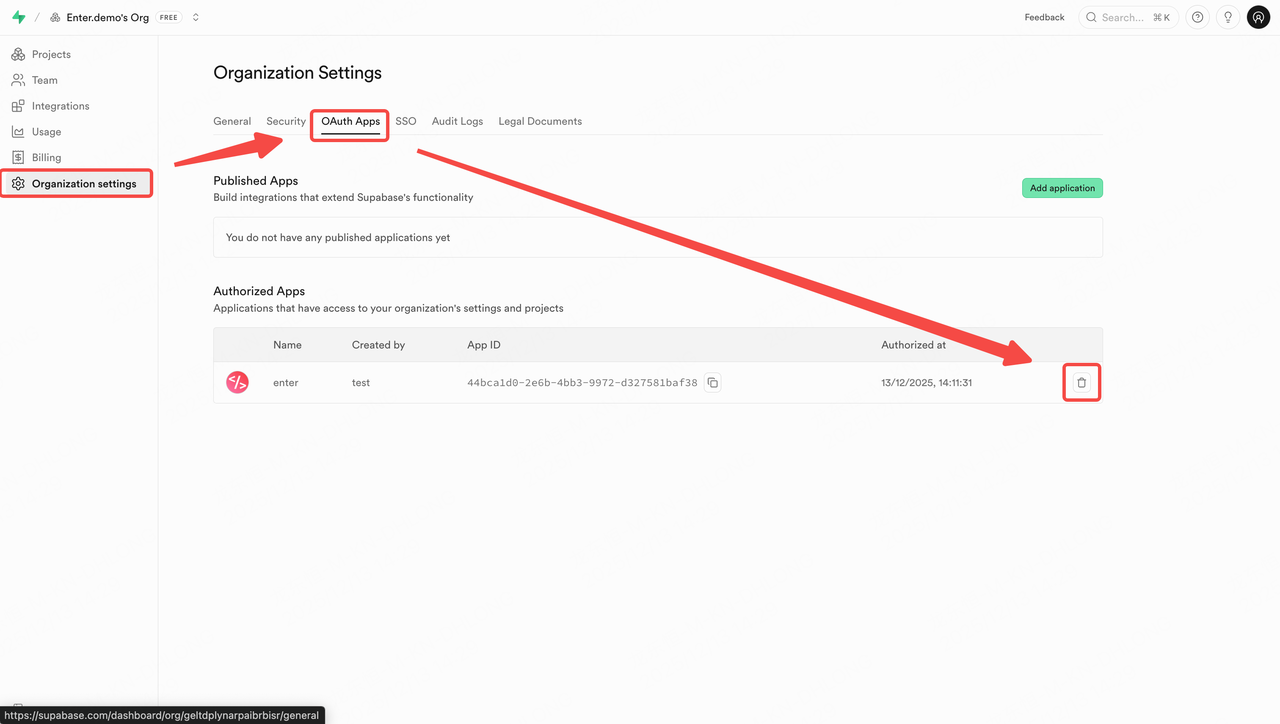
If you wish to remove the connection between your Enter Project and Supabase, follow these steps:
- Open Supabase and go to Organization Settings.
- Click OAuth Apps.
- In the Authorized Apps list, find Enter.
- Click Delete on the right side of the entry to revoke access.