How to Build Your First AI Agent with Enter Agent Builder
Create your first AI Agent with Enter Agent Builder. Start from a template, customize it with Skills and Knowledge, test it before publishing, then use it as a standalone web app, add it to an Enter website, or connect it to Slack and Feishu.
Building an AI agent should not require starting from a blank technical setup.
With Enter Agent Builder, you can create your own agent through a guided workflow: start from a template, generate the agent configuration, customize its Skills and Knowledge, test how it responds, and publish it into the places where people actually need it.
Your agent can run independently, be embedded into a website, or connect directly to workplace platforms like Slack and Feishu.
Enter Agent Builder lets you create your own AI Agent, customize it with Skills and Knowledge, test it before launch, and publish it as a standalone web app, connect it to an Enter website, or bring it into team platforms like Slack and Feishu.
If you have ever wanted your own AI employee without writing code, Agent Builder is built for that.
Instead of starting from a blank setup, you can begin with a ready-made template, let Enter generate the first version, then refine the Agent with your own business content and capabilities.
Here is the full workflow.
Create a New Agent
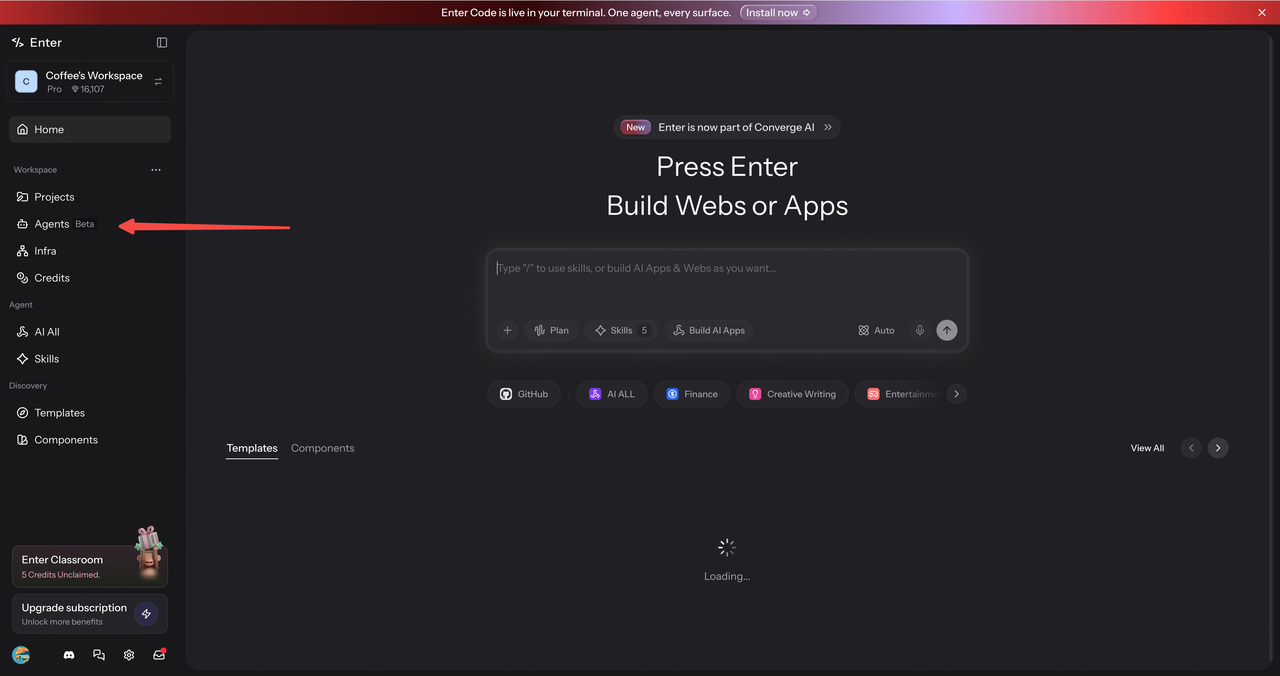
Open Enter and click Agent.
Then click New Agent.
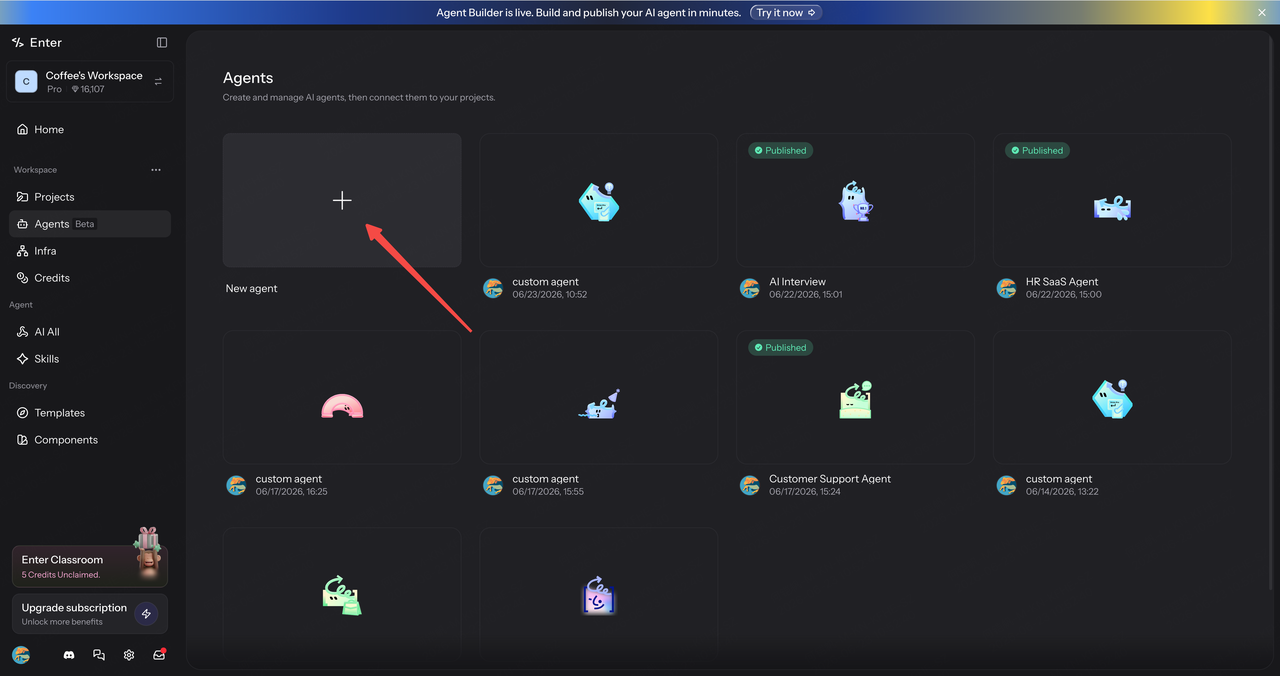
You will see several pre-built Agent templates, including Customer Support Agent, Data Insight Agent, Product Research Agent, and more.
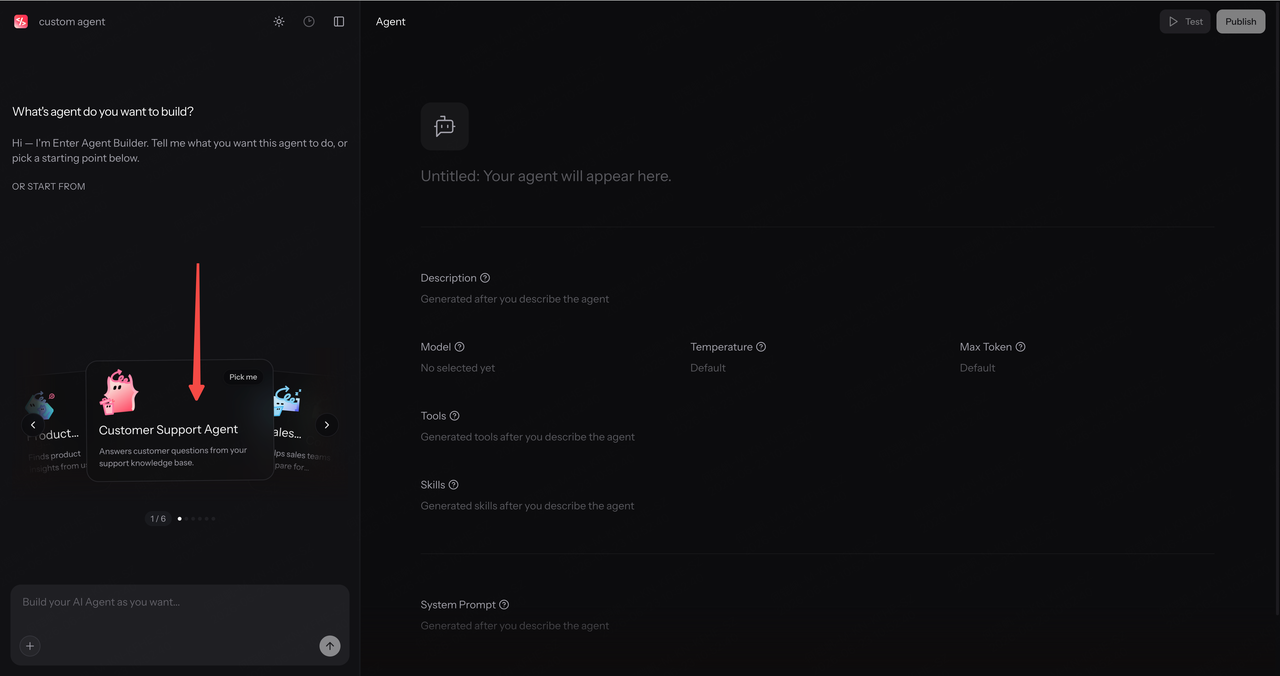
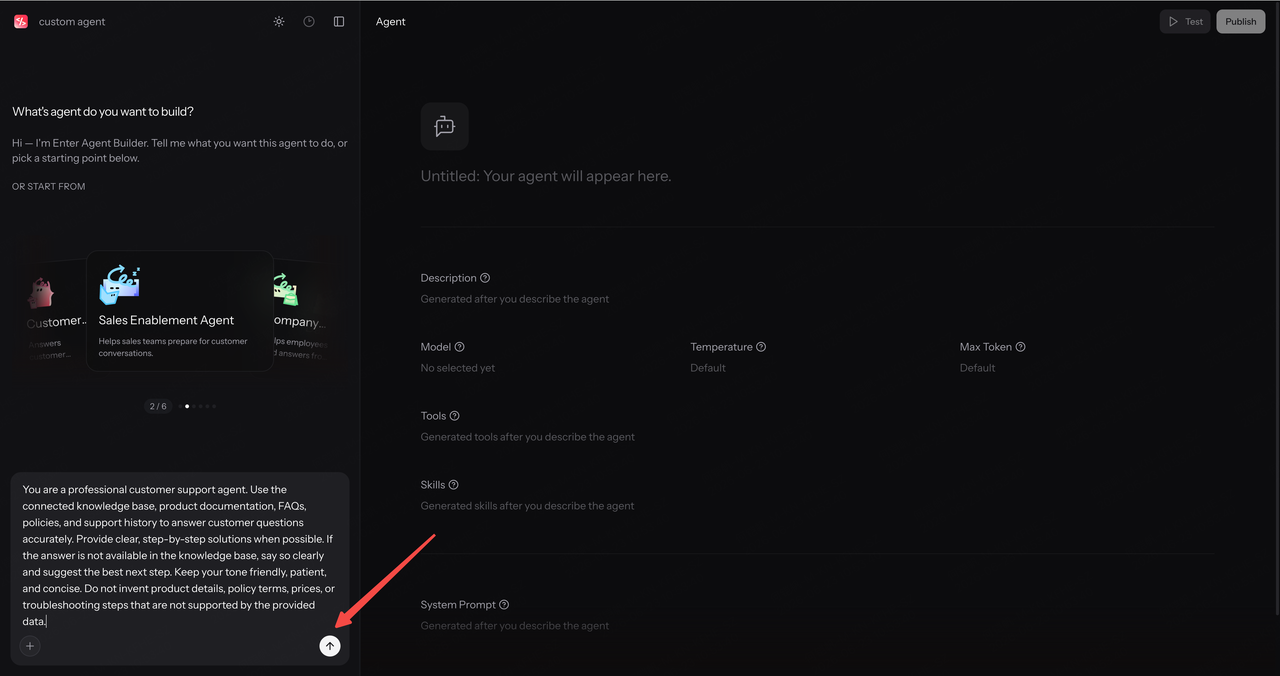
Once selected, Enter automatically prepares a professional prompt in the chat box. Click Send, and Enter begins building the Agent.
Within seconds, your first Agent is ready with a basic setup, including Description, System Prompt, model selection, and tool configuration.
Add Skills
Next, customize what your Agent can do.
Start with Skills.
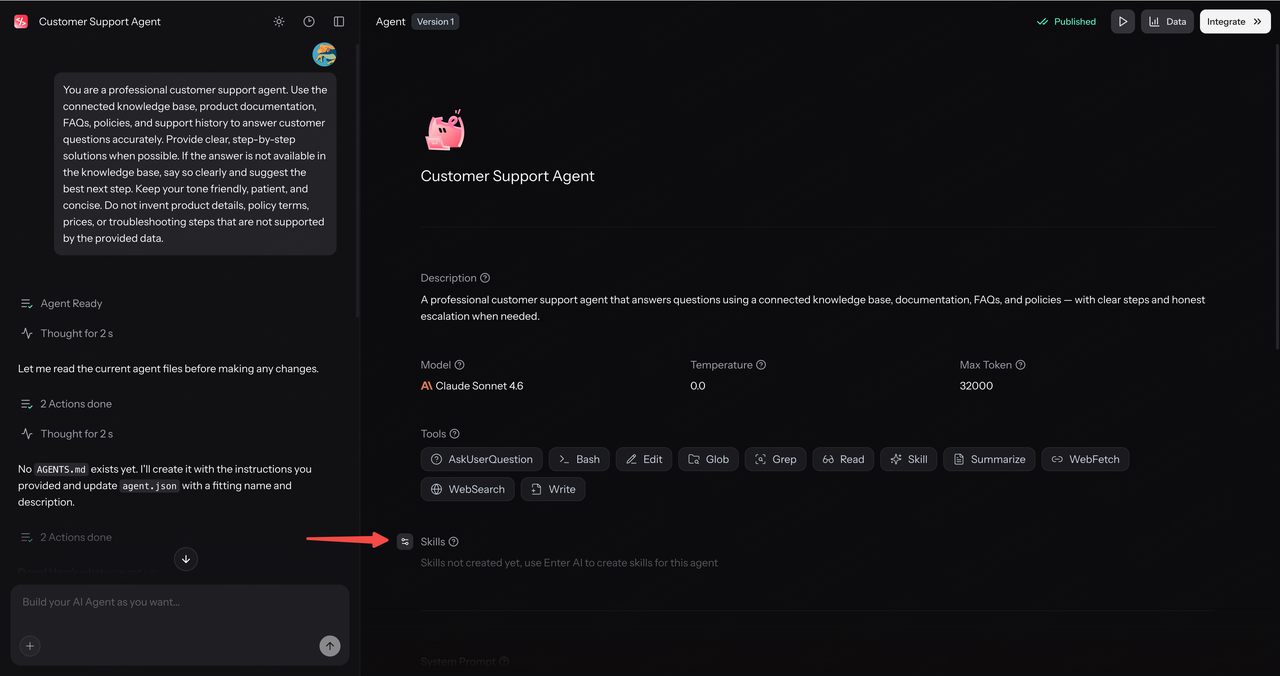
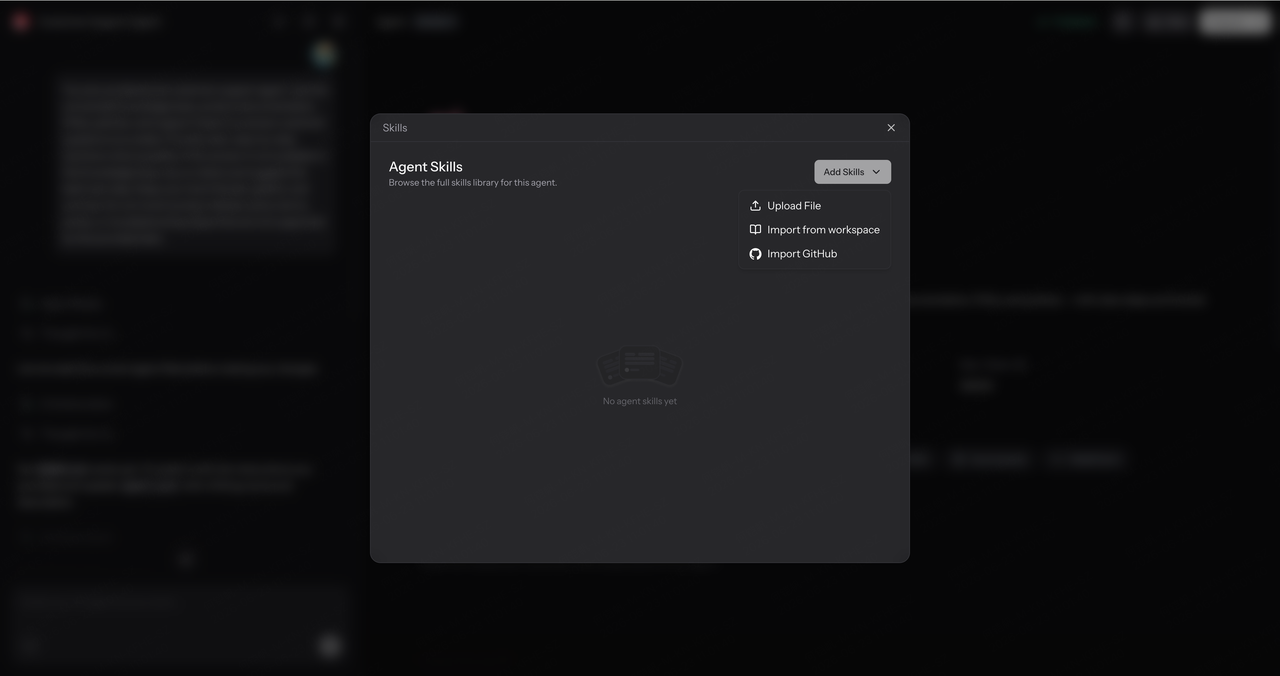
Skills are the Agent’s specialized capabilities. They can include domain knowledge, workflows, instructions, and best practices for completing specific tasks.
For example, customer support, content creation, code review, and data analysis can all be packaged as reusable Skills.
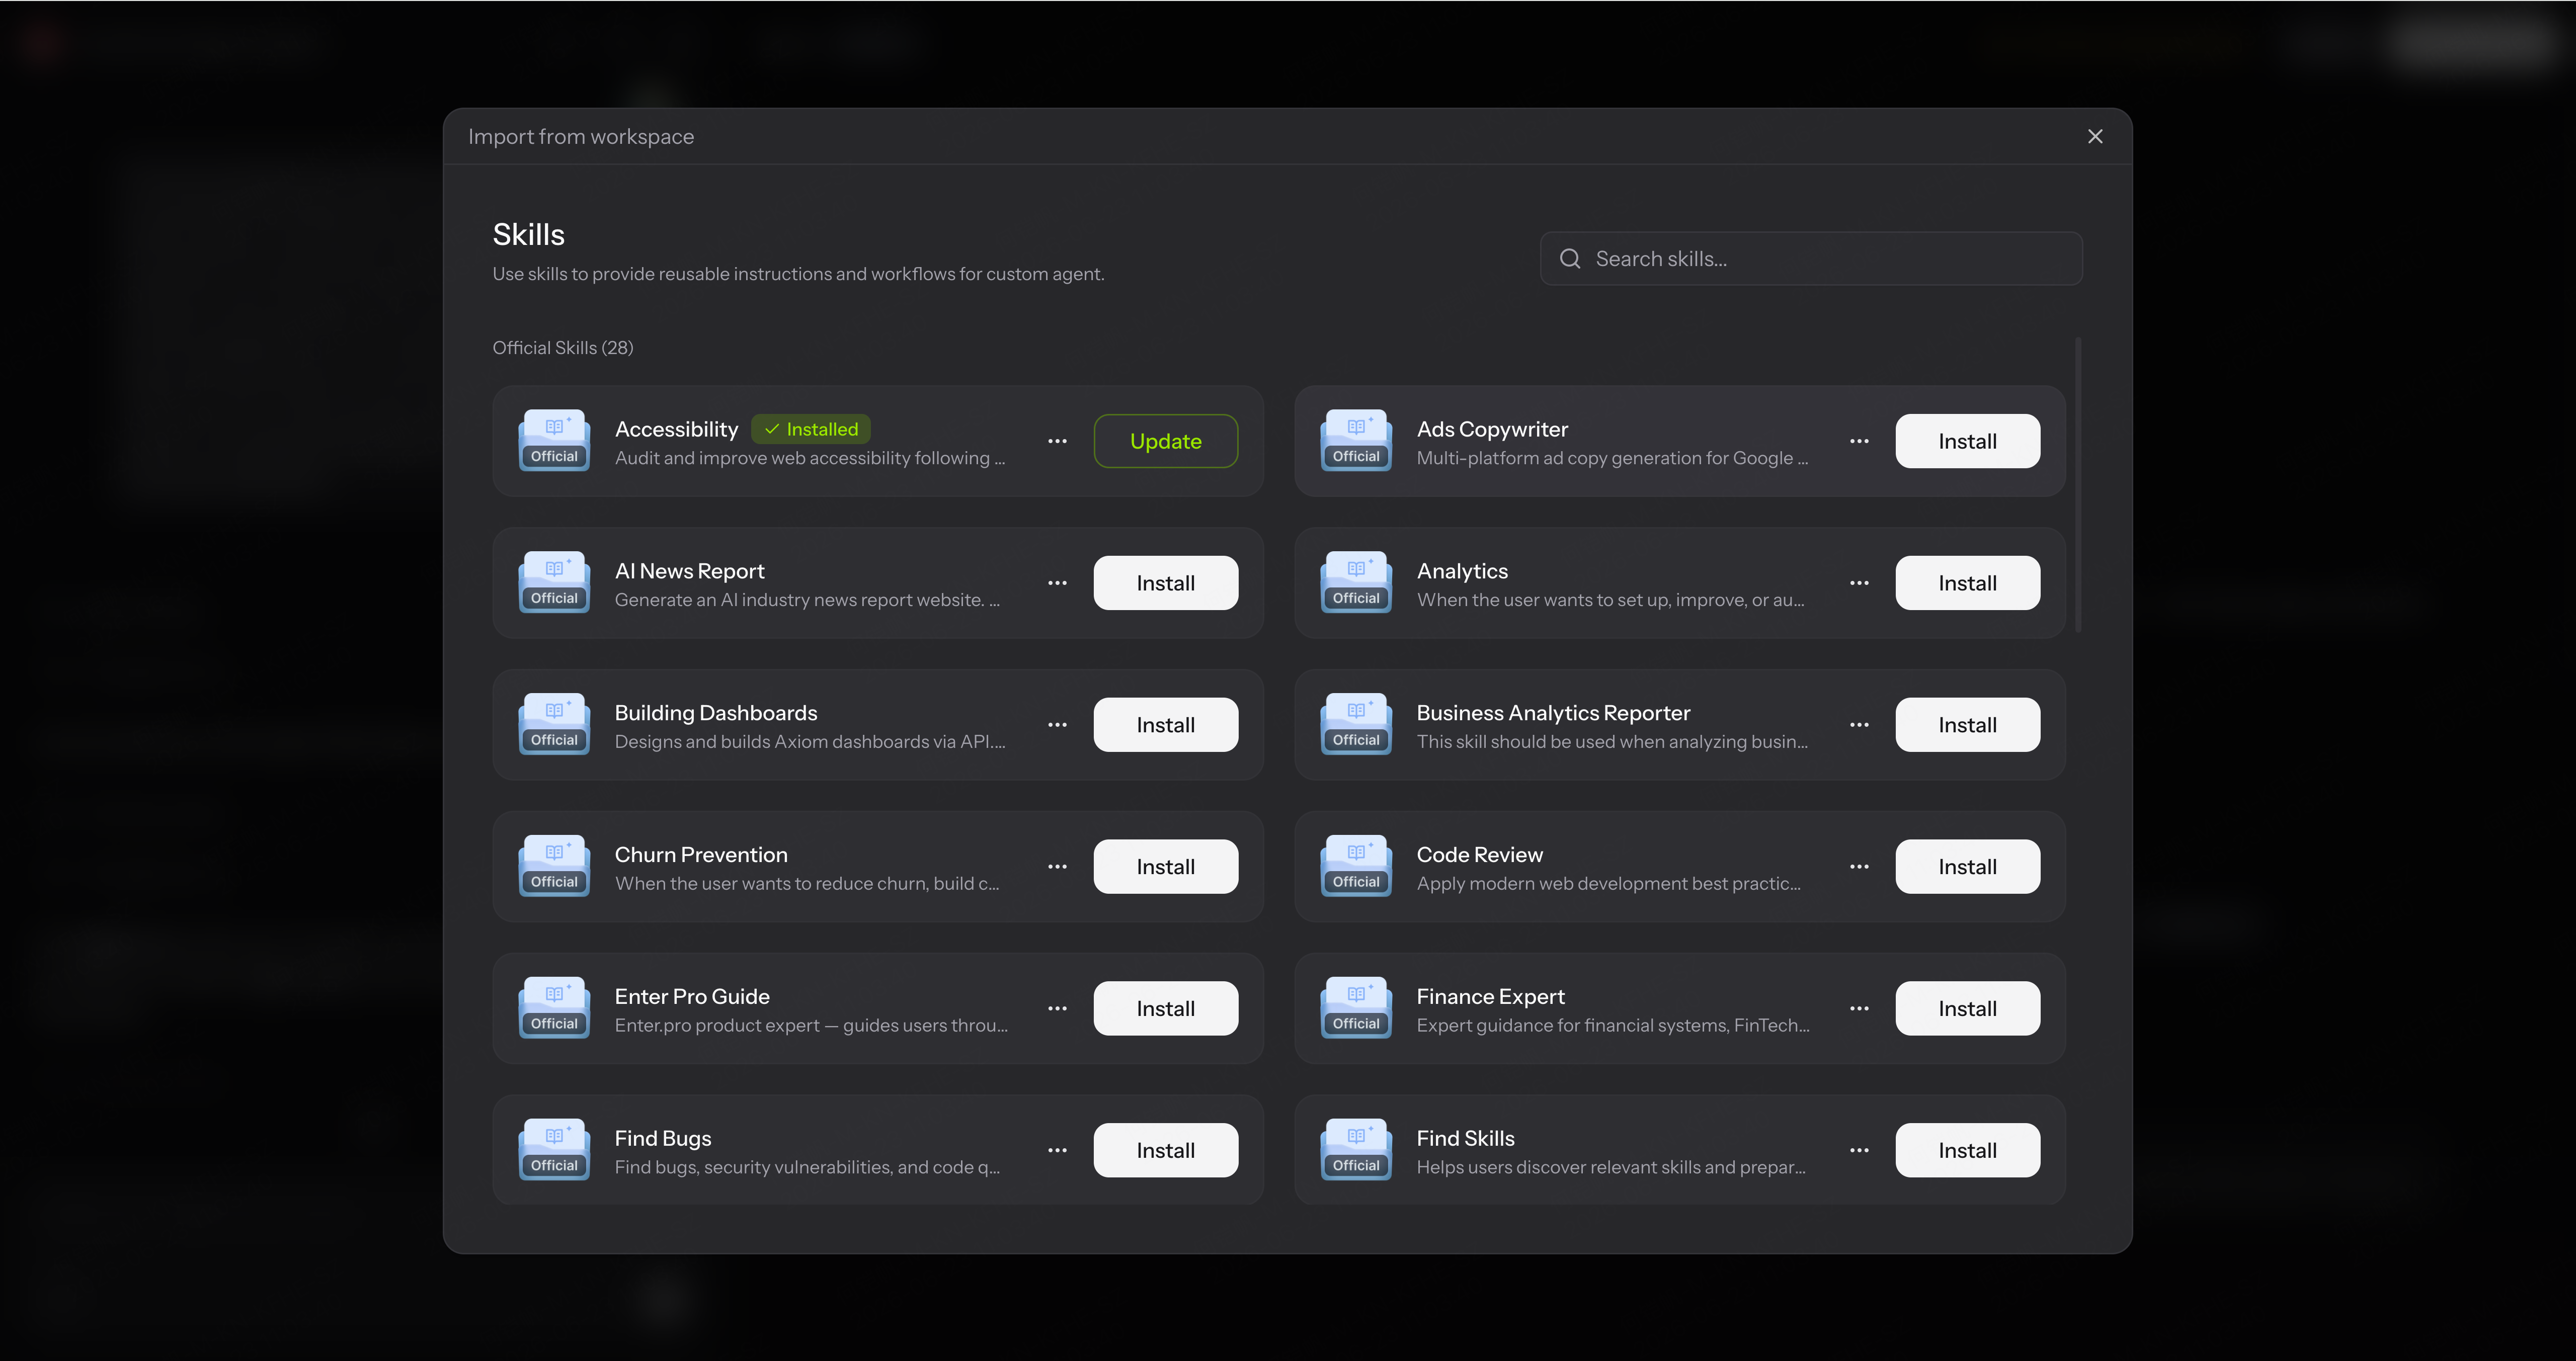
In Enter, you can upload files, import workspace resources, or connect GitHub repositories to create and extend Skills. If you do not have a ready-made Skill yet, you can simply tell Enter in the chat box that you want to create one.
This helps your Agent not only know what to do, but how to do it effectively.
Add Knowledge
Next, Knowledge.
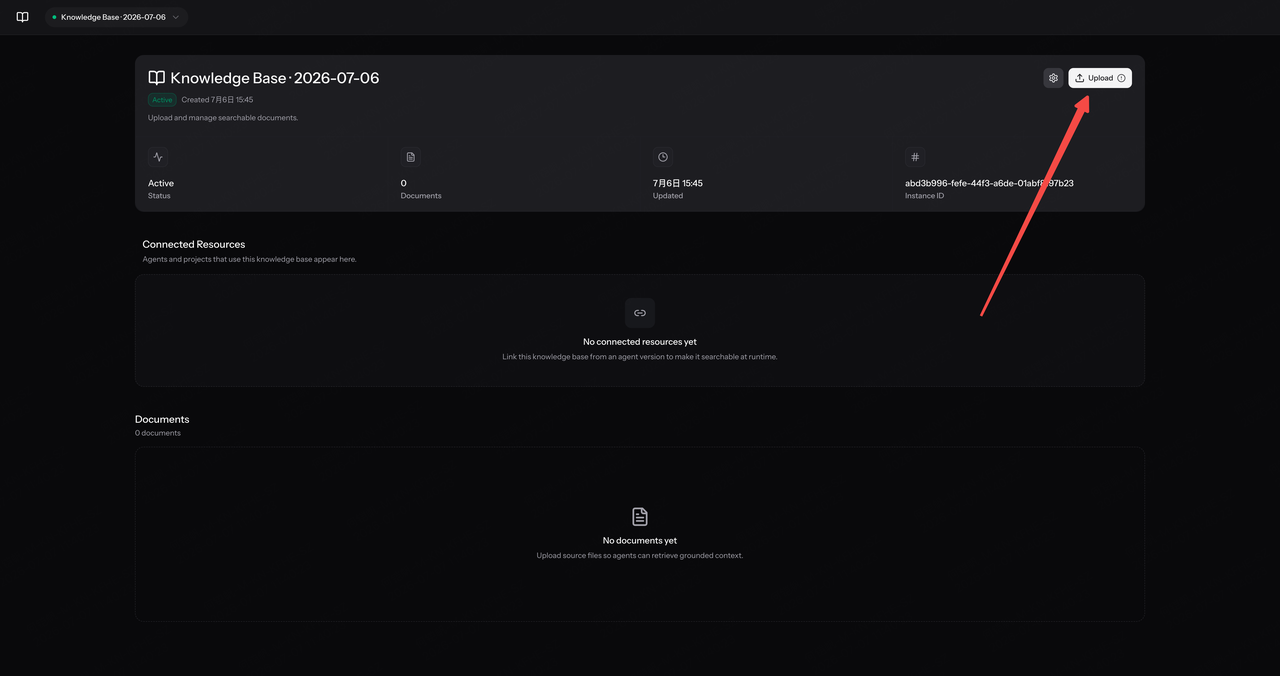
Knowledge is where your Agent learns about your business. You can add product information, help documents, FAQs, user guides, and other materials your Agent should reference.
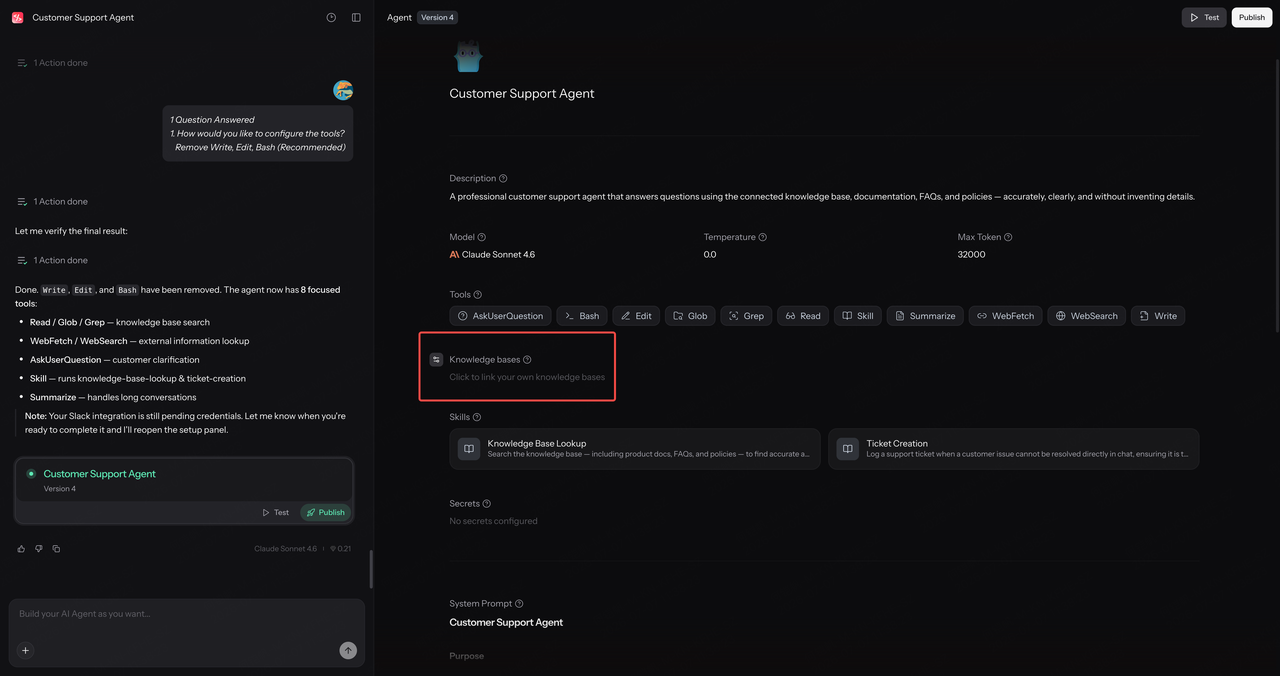
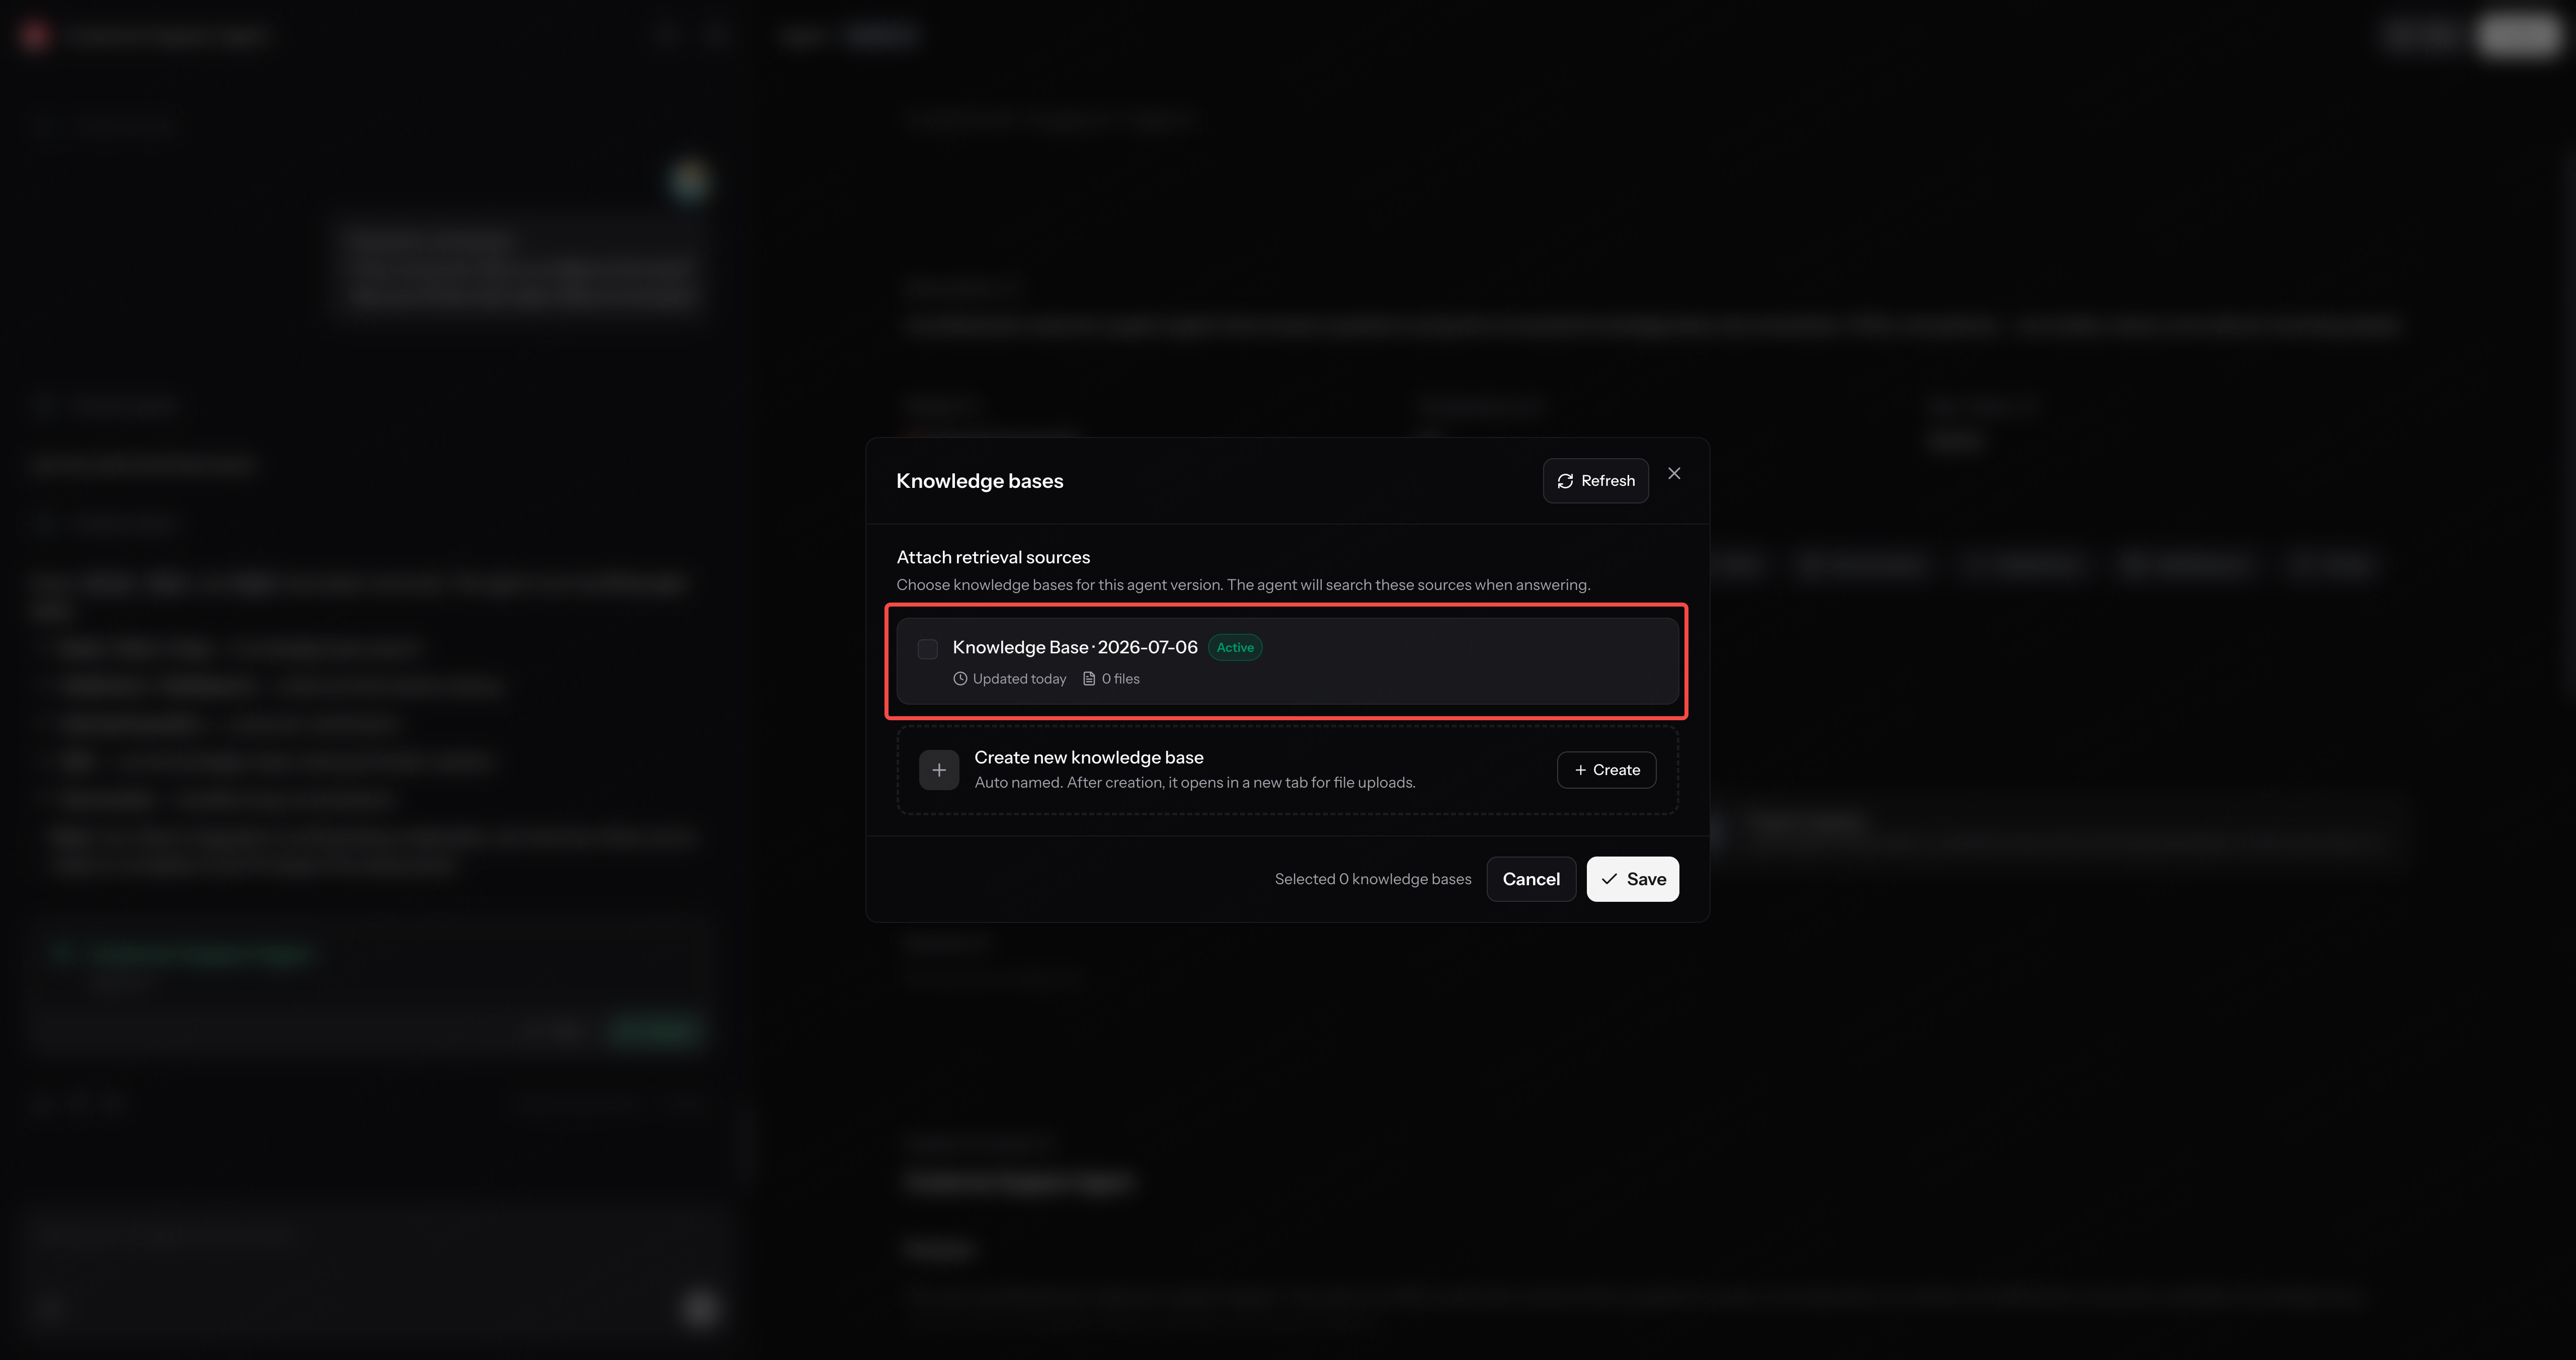
Once uploaded, the Agent can answer questions using your actual content instead of relying only on the model’s general knowledge.
That is one of the key differences between an Agent and a general AI tool.
It does not just chat. It understands your business context and helps users solve real problems.
Test Before Publishing
Once everything is ready, test the Agent.
Click Test and ask a few common questions, such as:
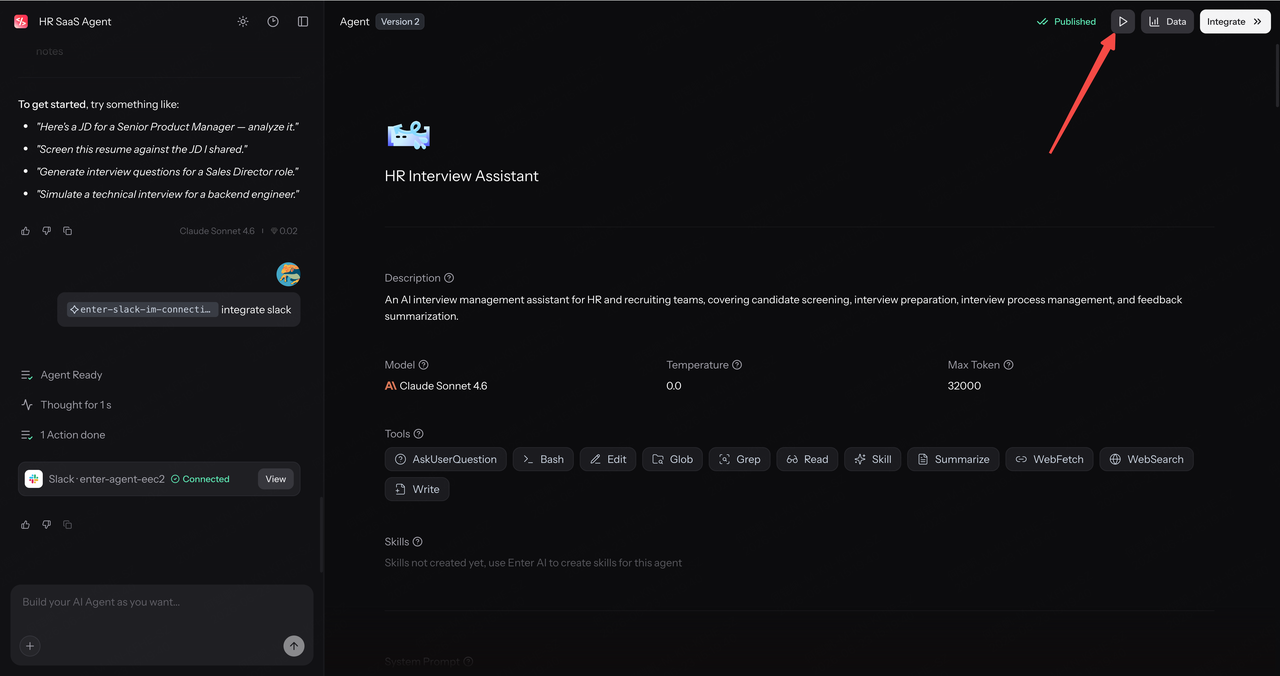
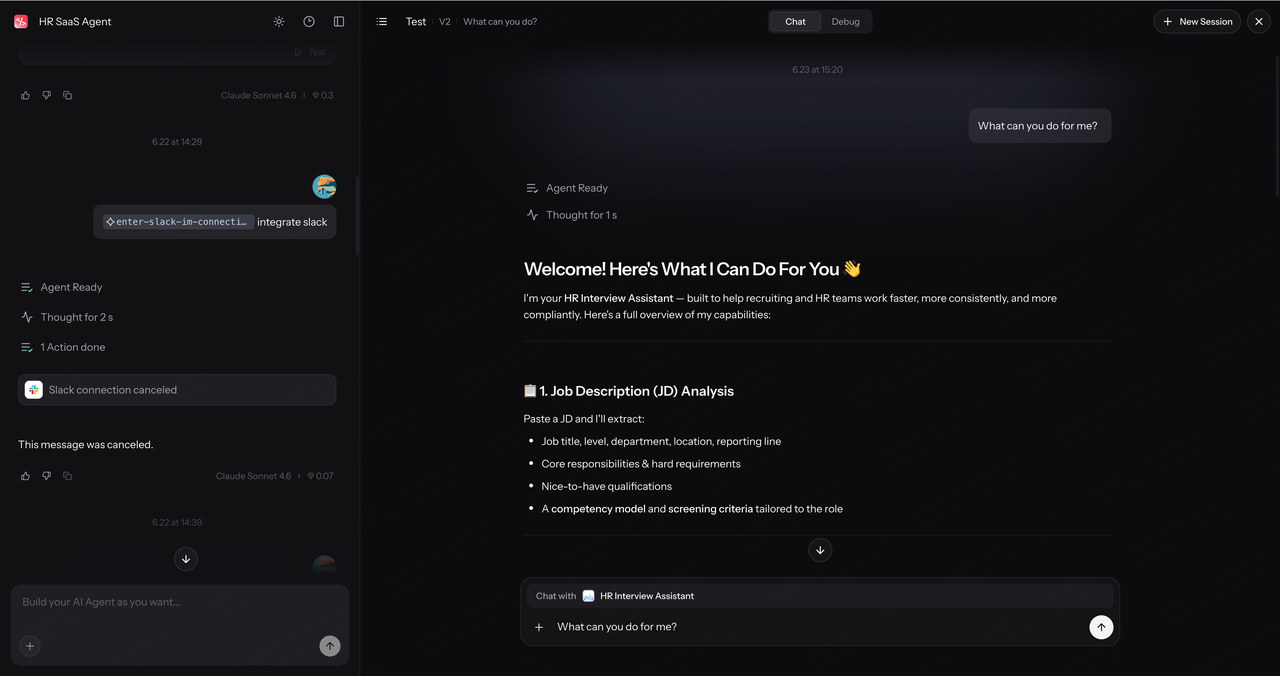
Before publishing, you can chat with your Agent anytime to verify that it behaves the way you expect.
If the answers are not quite right, refine the Skill, add more Knowledge, and test again.
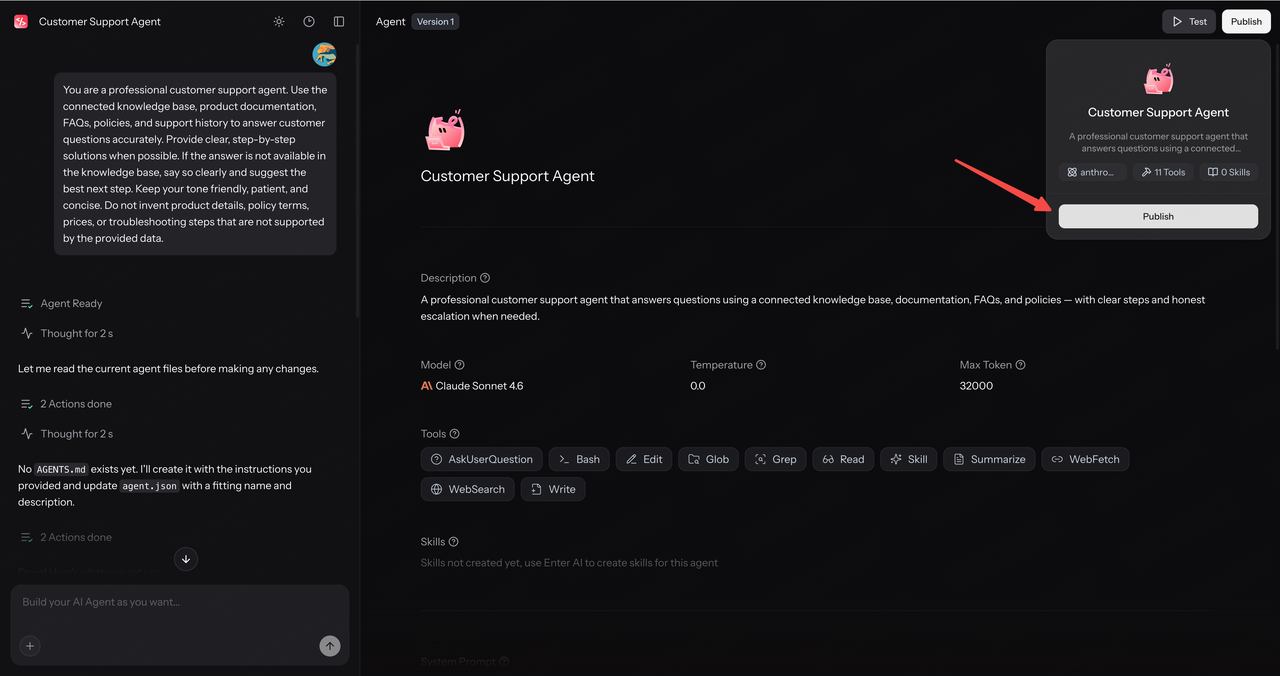
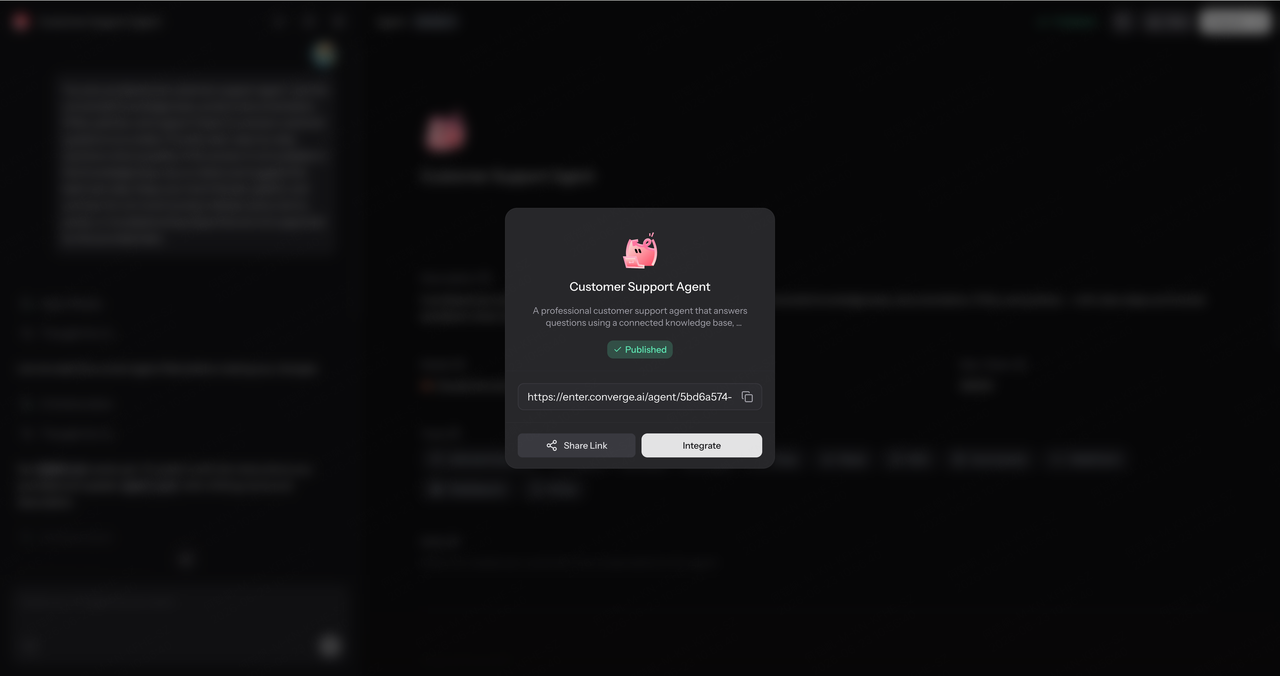
When the result looks good, click Publish.
Use Your Agent as a Standalone Web App
The simplest way to use a published Agent is as a standalone web application.
Click Share to generate a link.
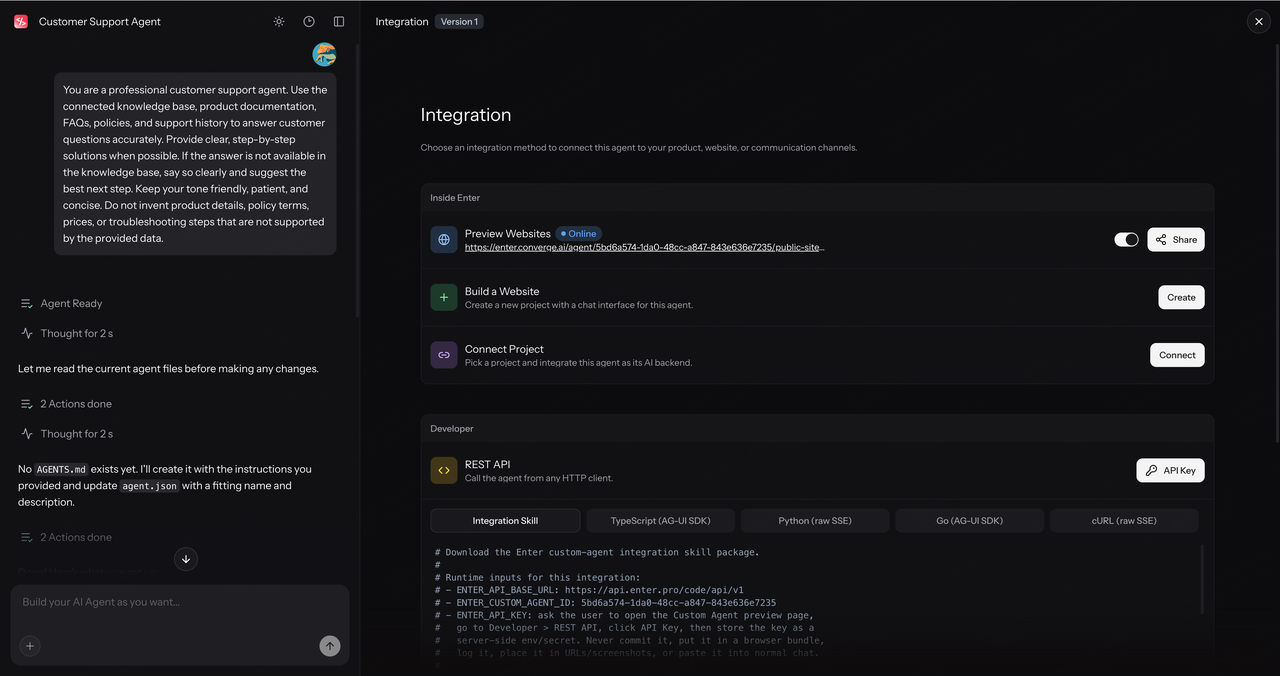
Customers, teammates, and external users can open the link and start chatting right away. No installation or additional setup is required.
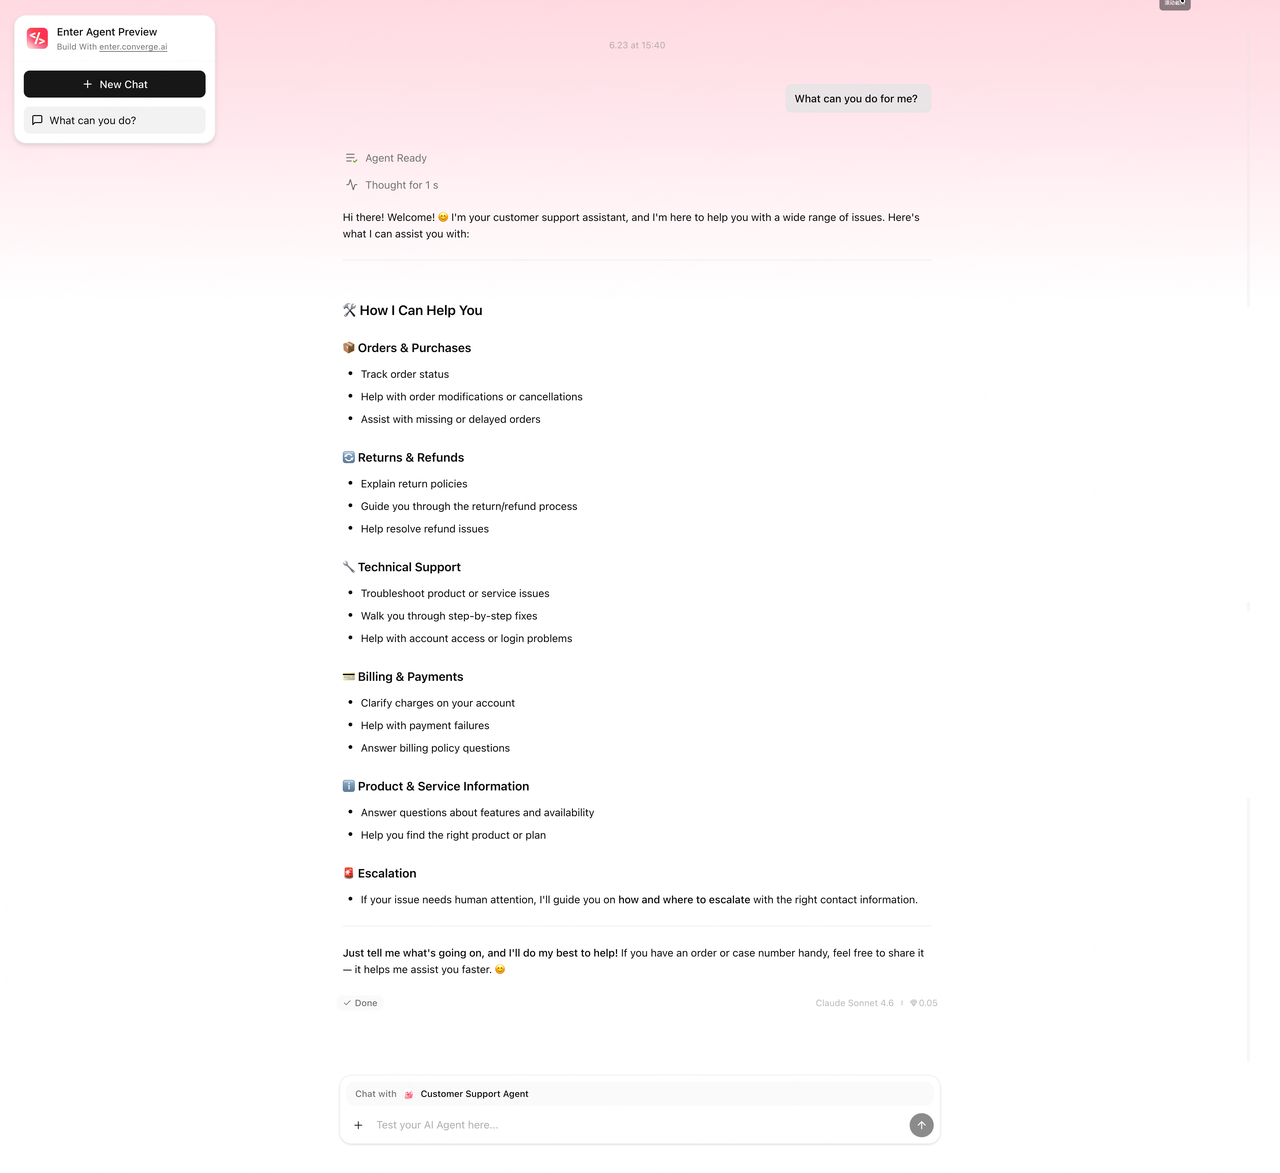
This is useful when you want to make an Agent available quickly without embedding it into a full product.
Add Your Agent to an Enter Website
Agents can also be integrated into websites built with Enter.
Click Connect, then choose the website project you want to integrate.
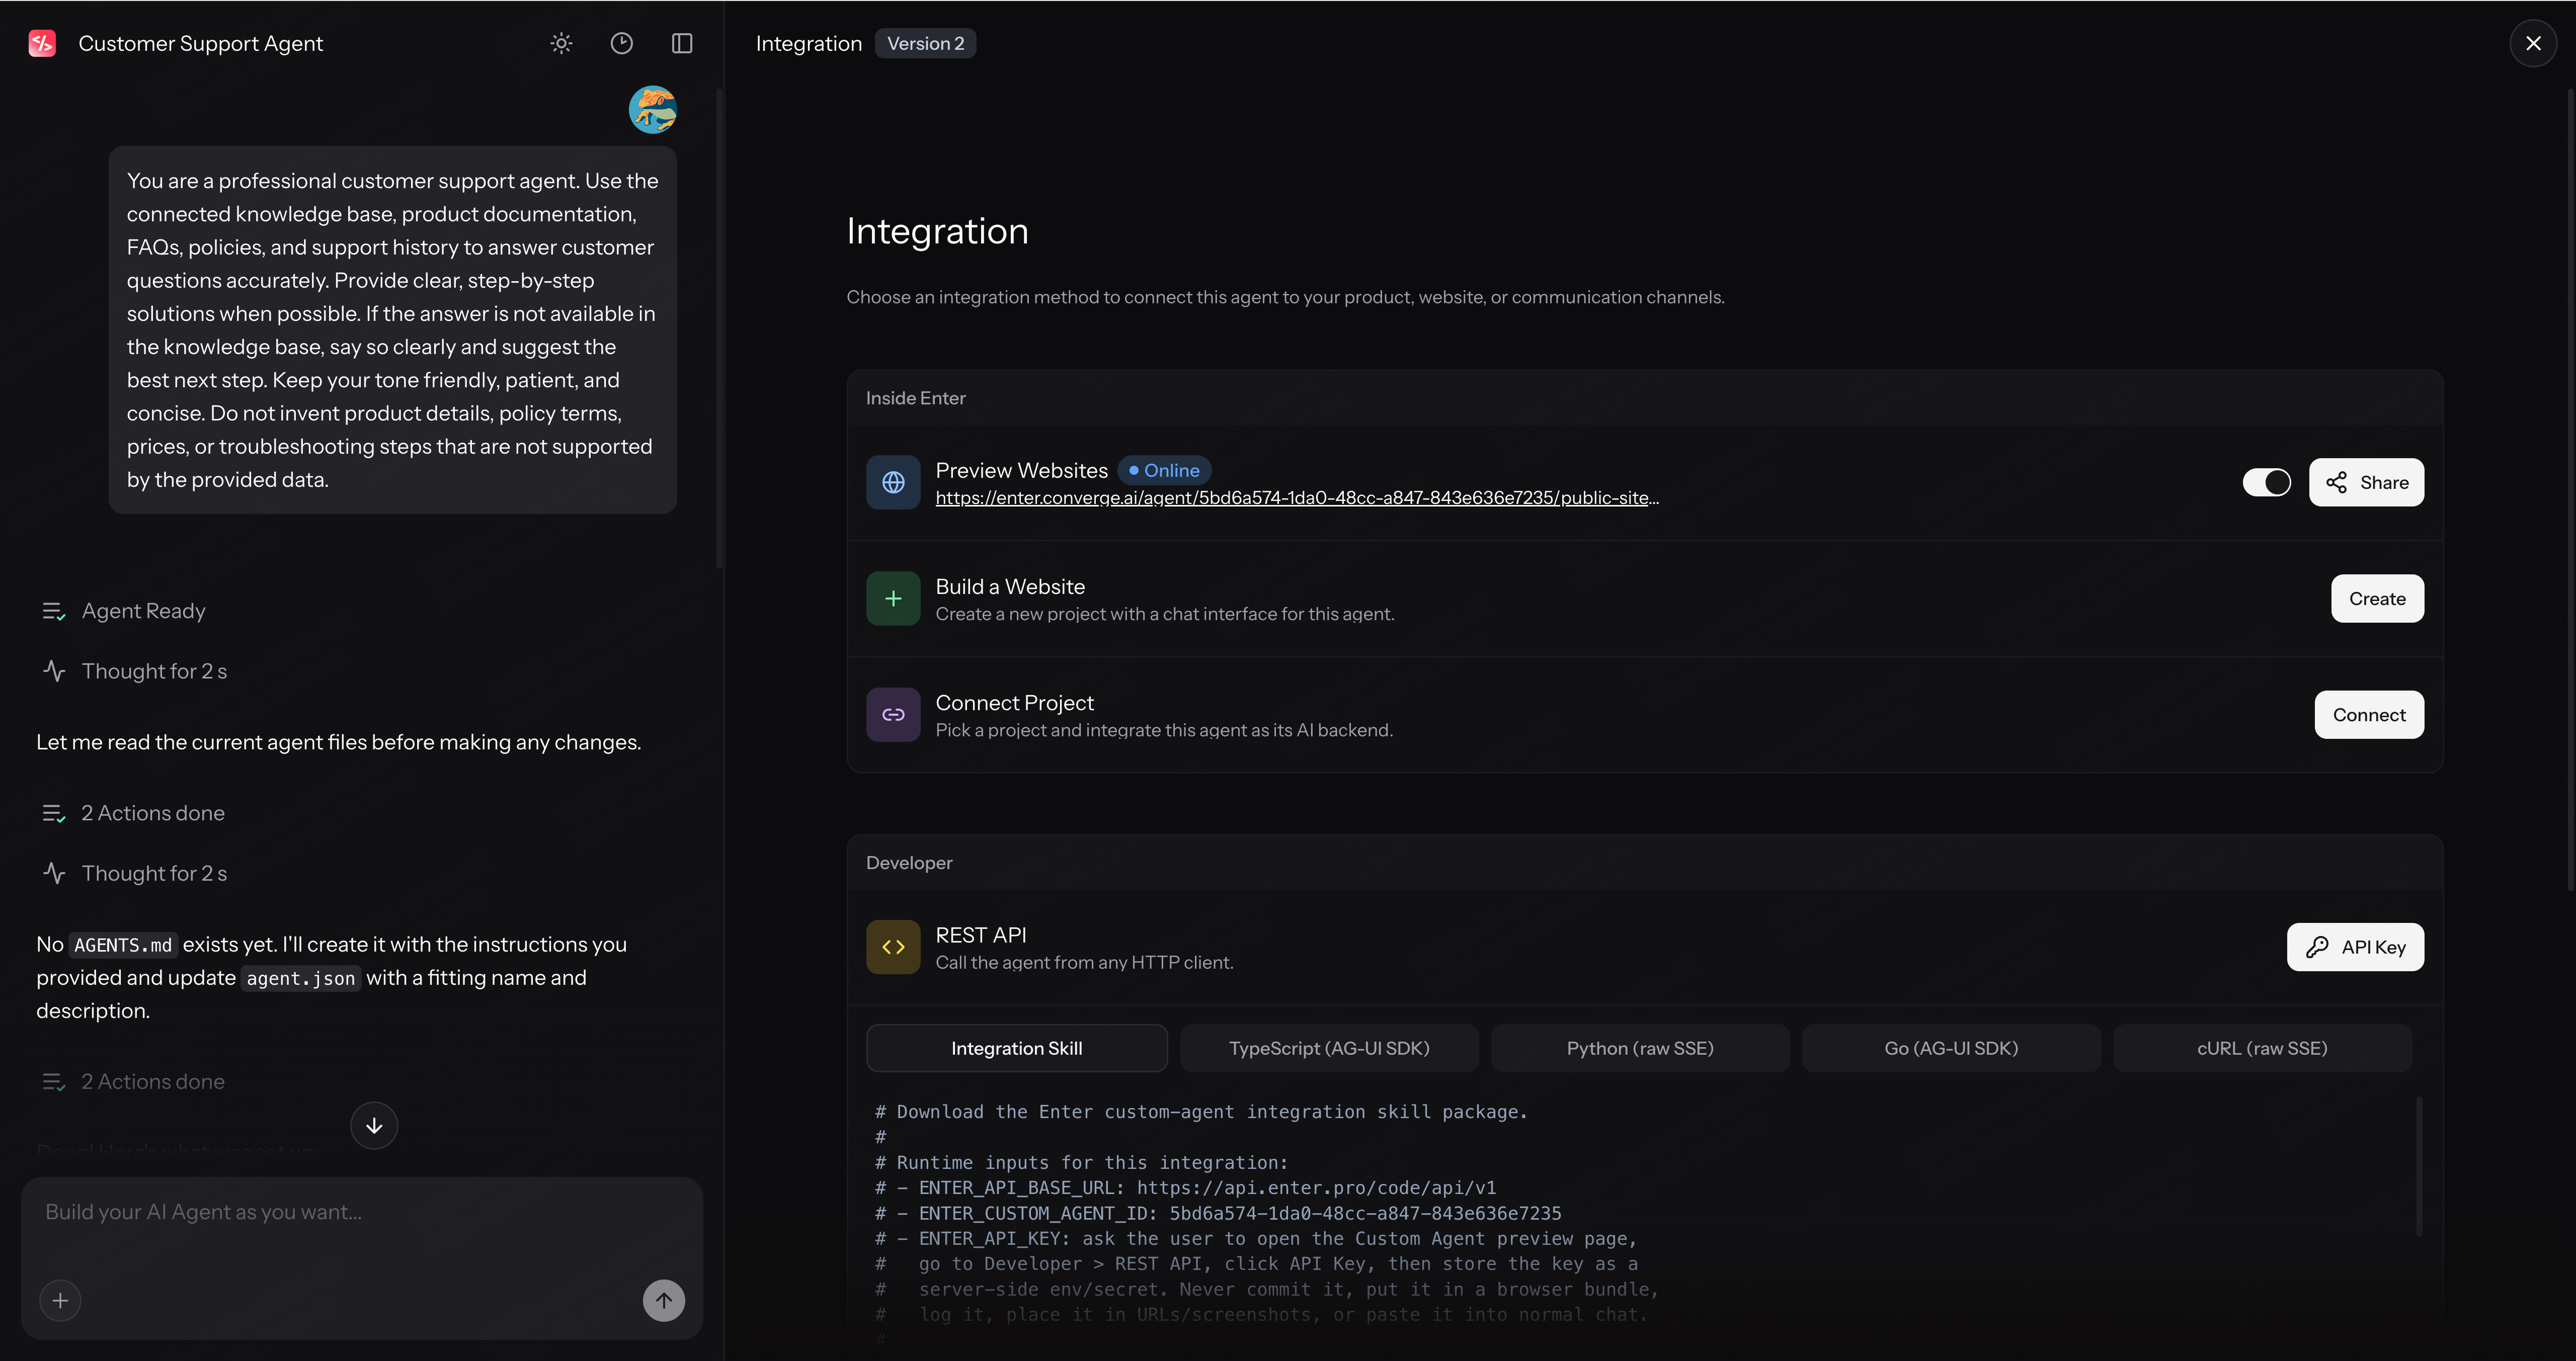
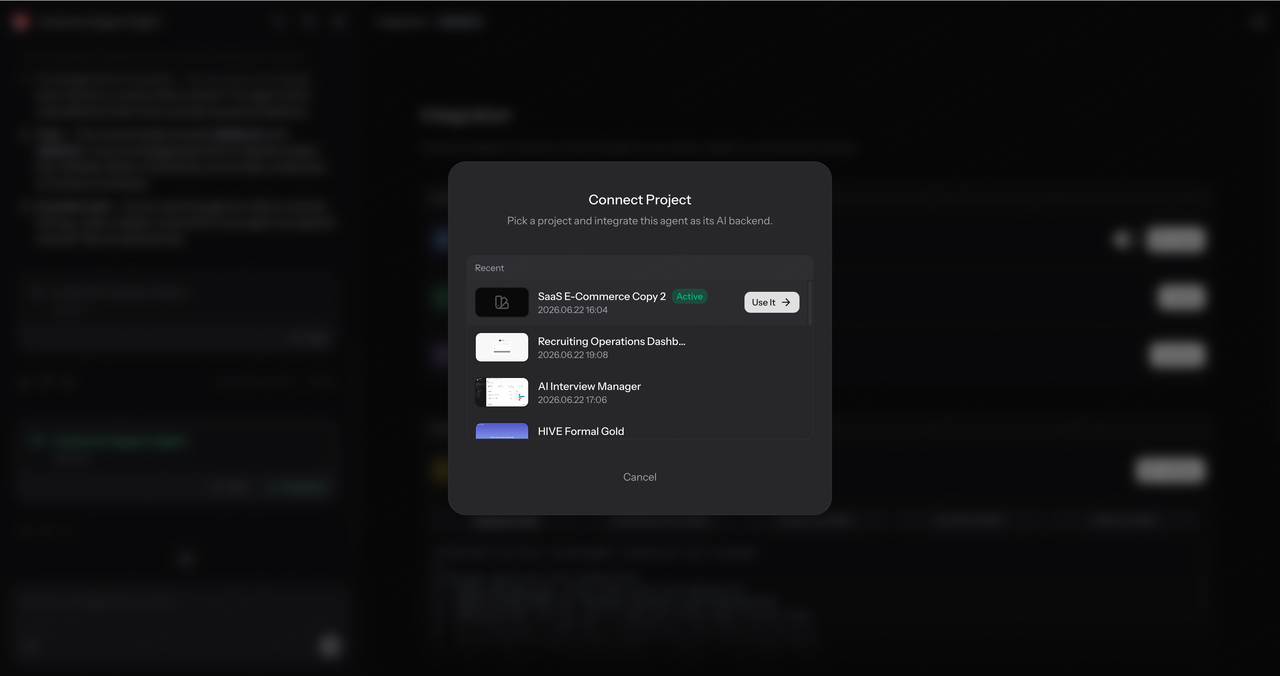
Enter opens the project and prepares the setup. In many cases, you only need to click Send, and the rest is handled automatically.
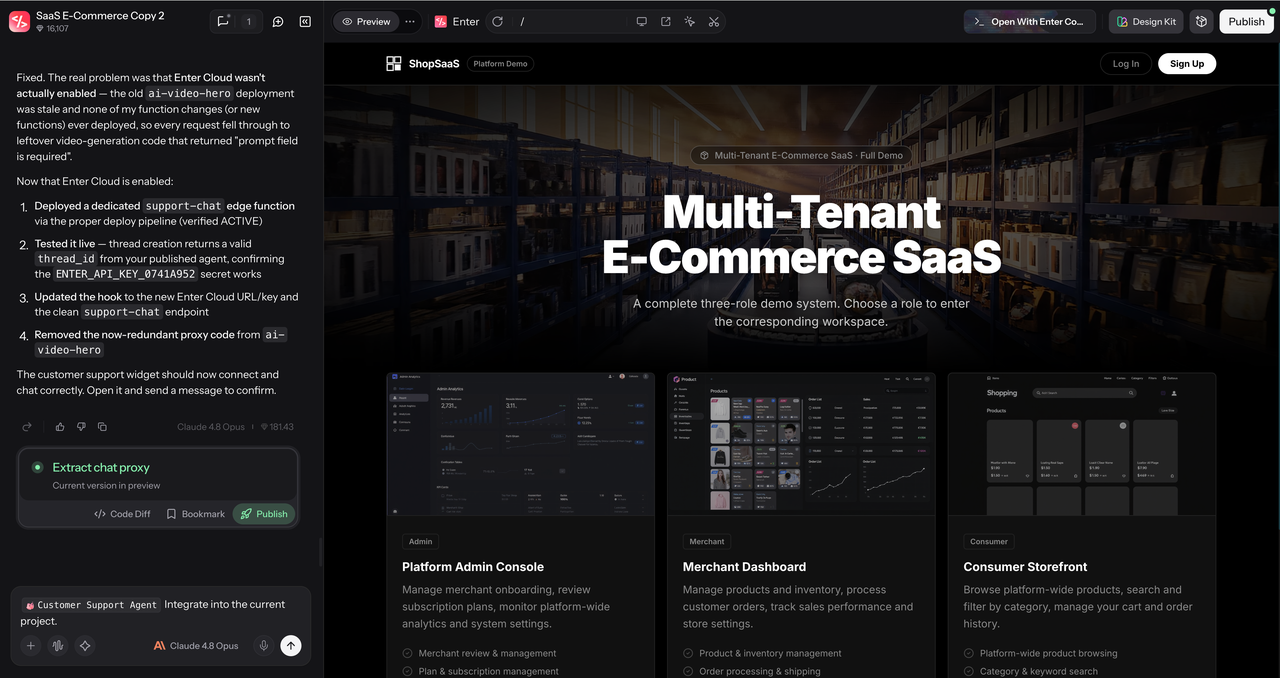
Once connected, the Agent appears on the website. Visitors can ask questions about product features, usage instructions, or common issues.
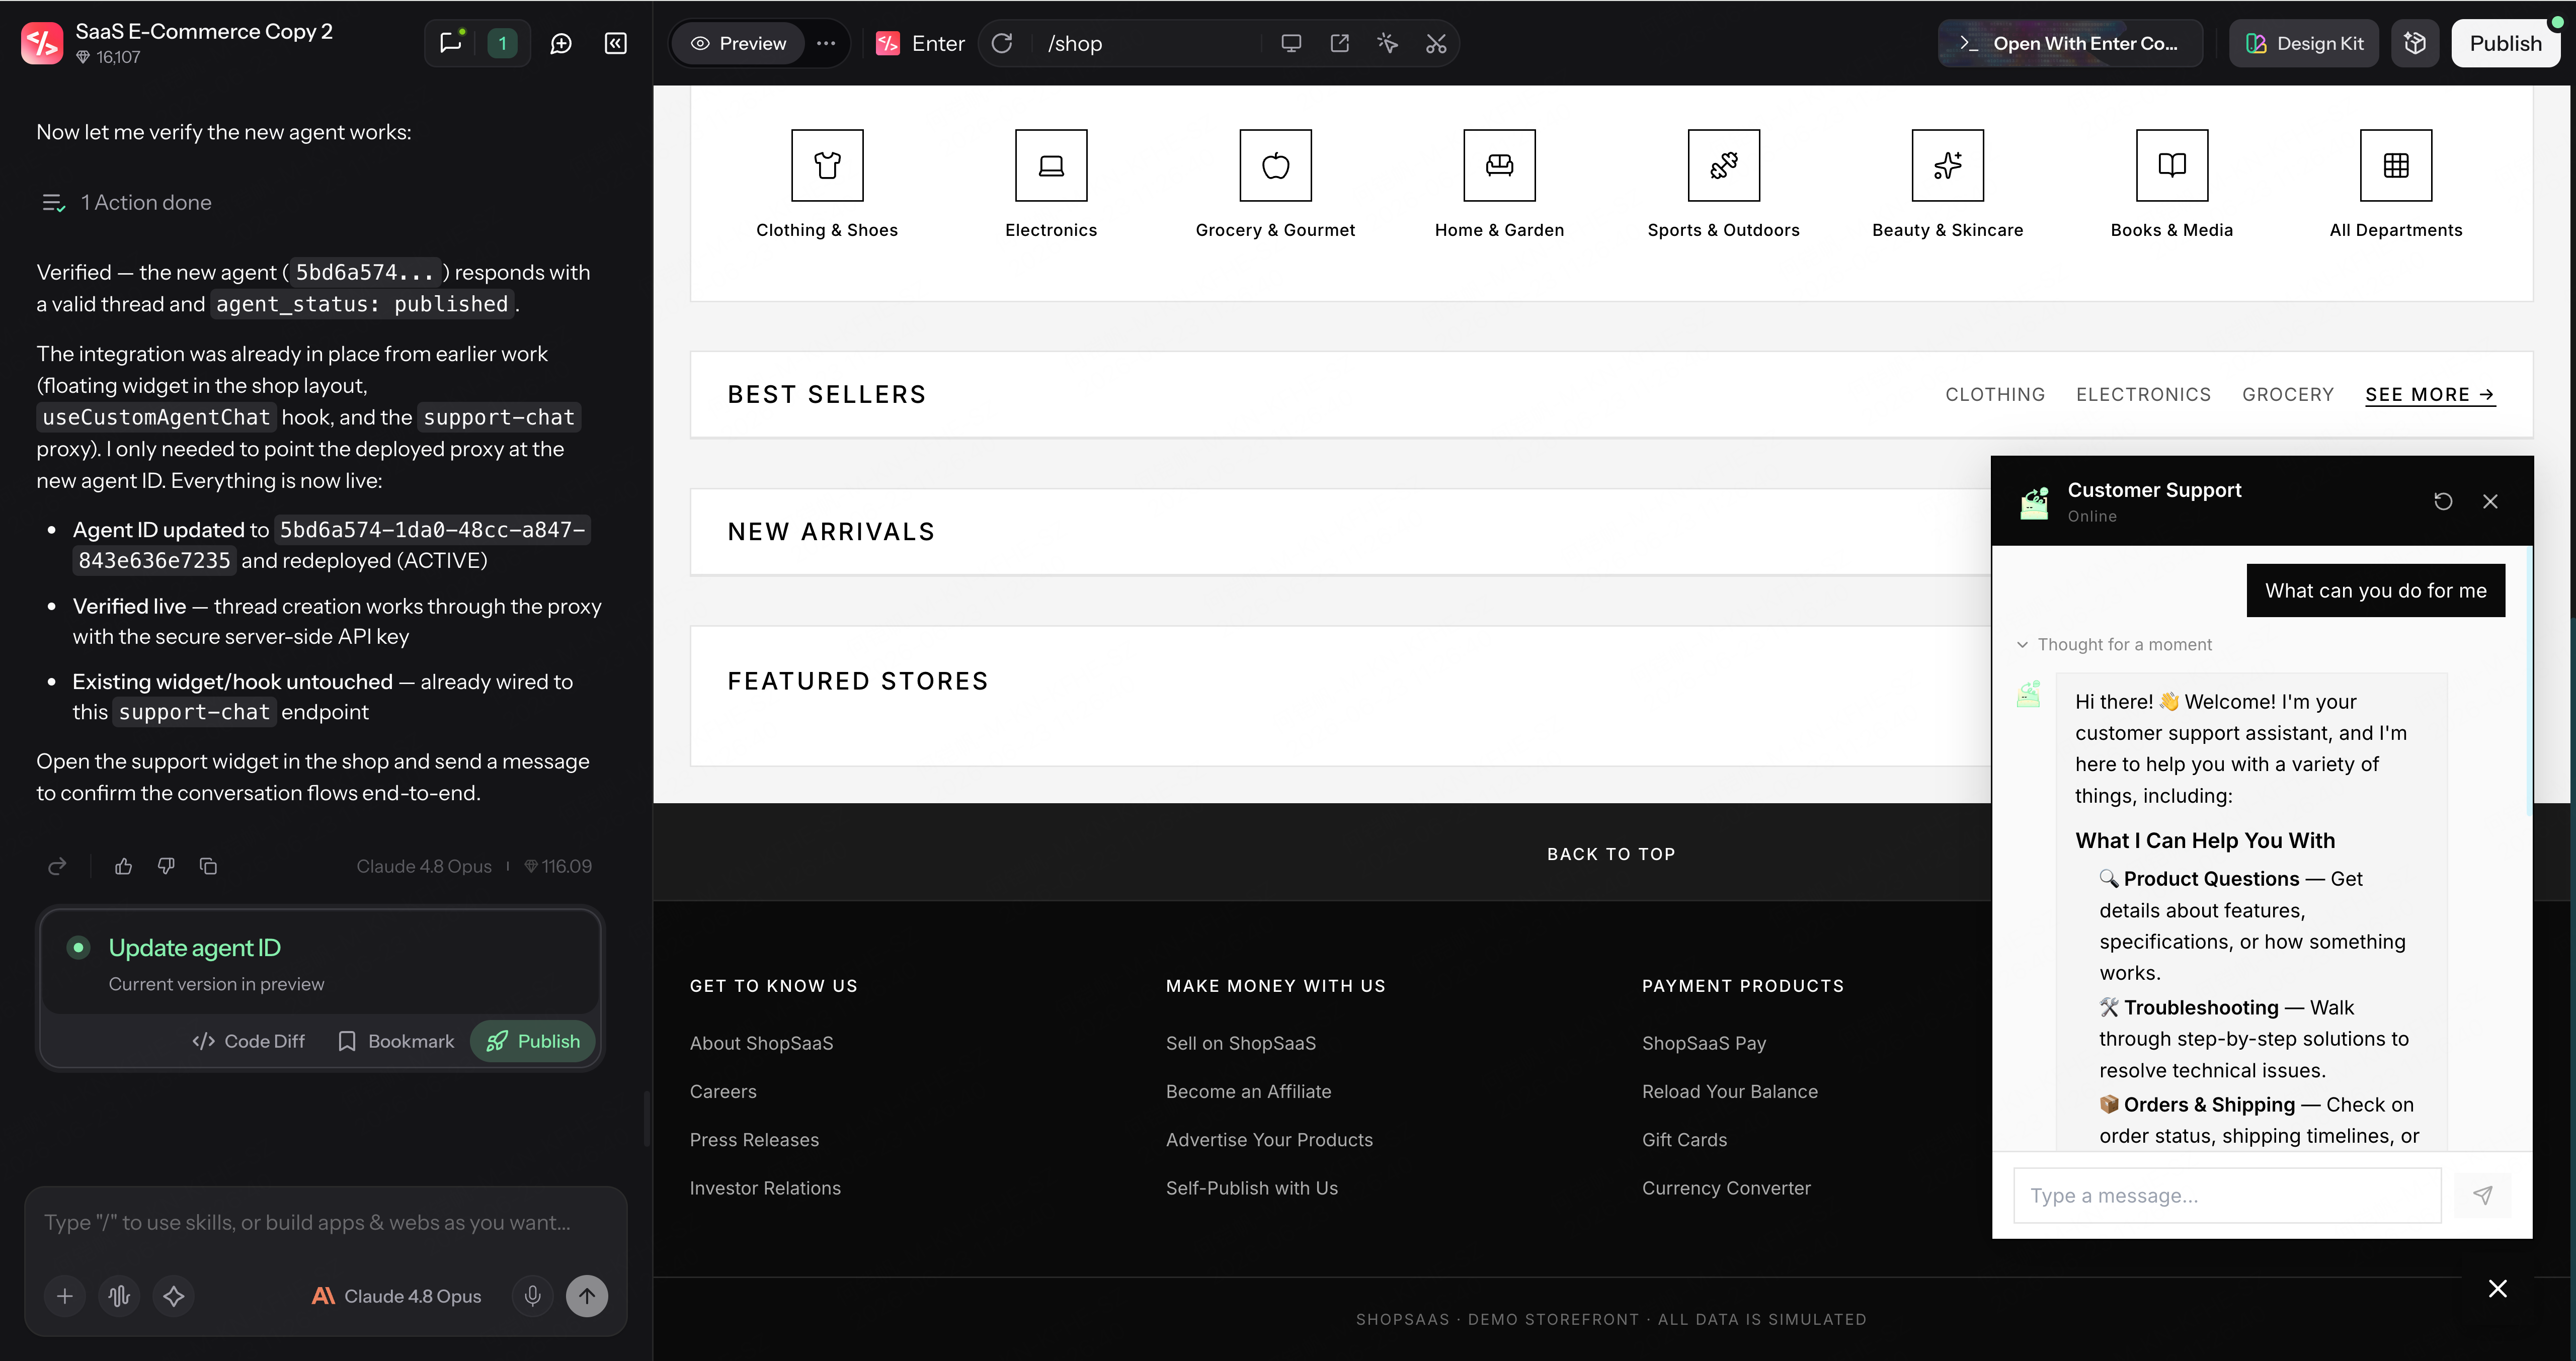
For a Customer Support Agent, this gives your website a 24/7 assistant that can help users directly from the page.
Connect Your Agent to Slack
Agents can also join the tools your team uses every day.
To connect an Agent to Slack, click Connect under Slack. Send the setup prompt and give your Agent a name.
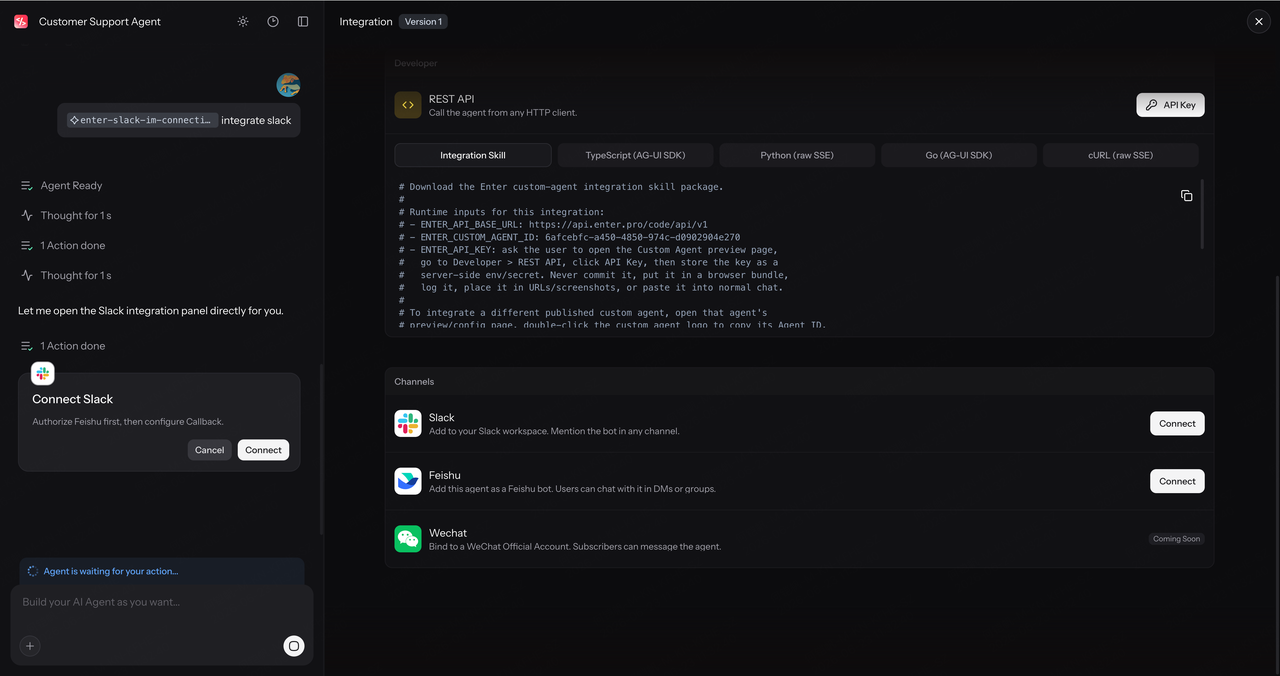
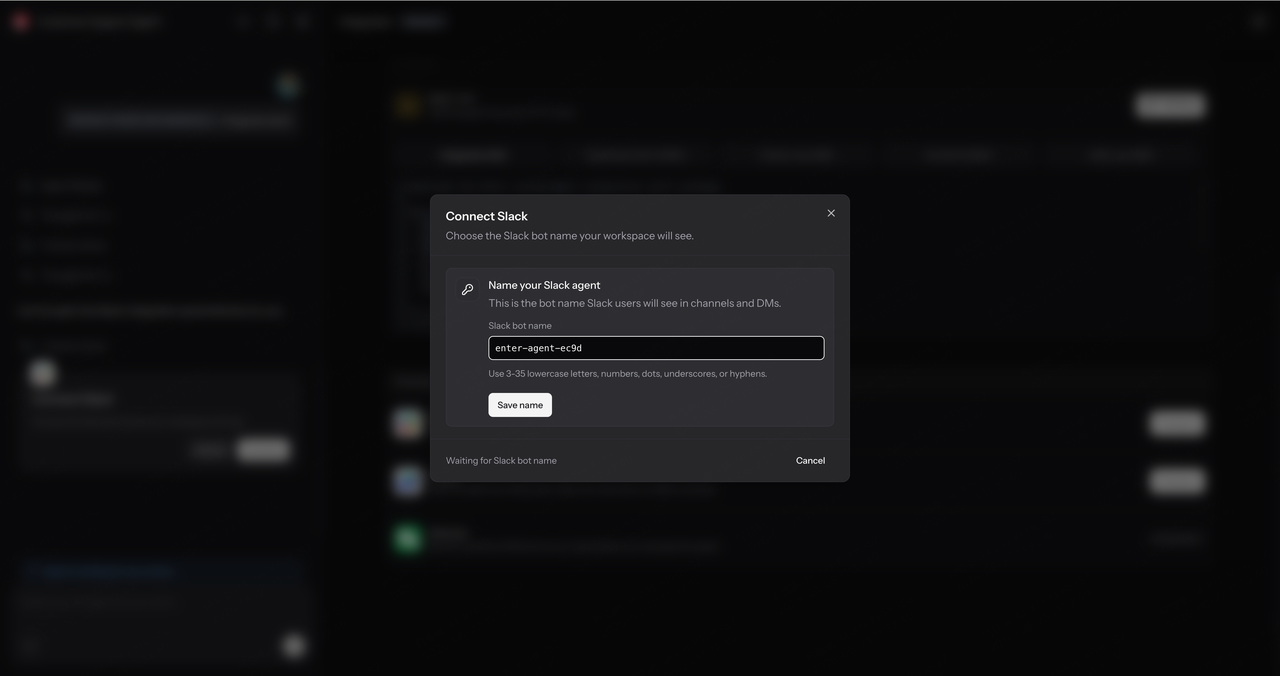
Then click Open Slack Manifest. This opens the Slack Developer Portal.
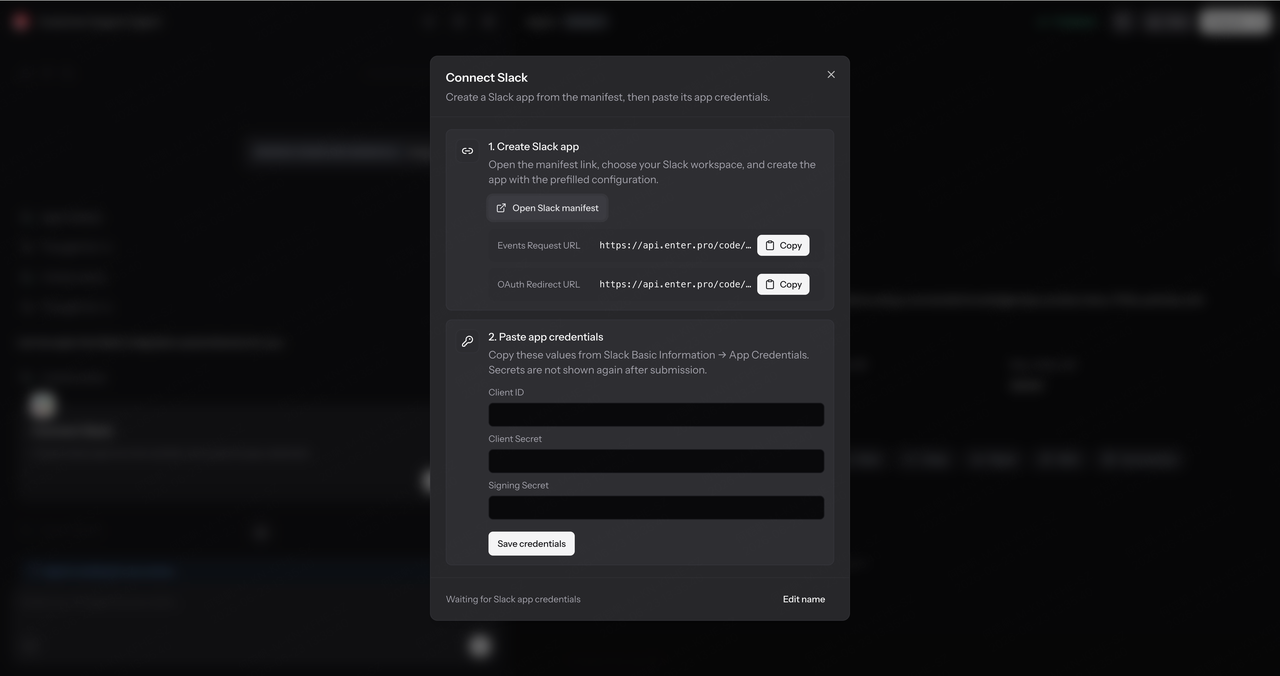
Choose your workspace and create the app. Then copy the generated Client ID, Client Secret, and Signing Secret back into Enter.
Save the credentials, click Install to Slack, and complete authorization.
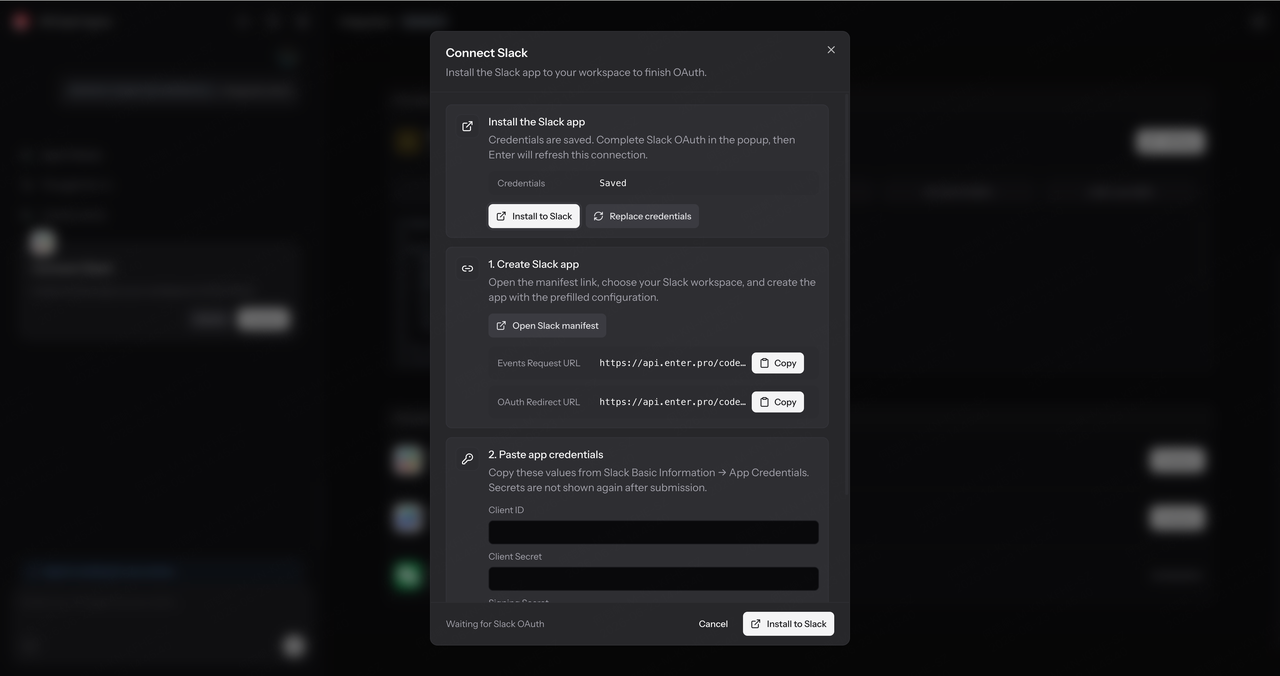
Once configured, your Agent appears in Slack Apps. You can now chat with it directly inside Slack.
Connect Your Agent to Feishu
You can also connect your Agent to Feishu.
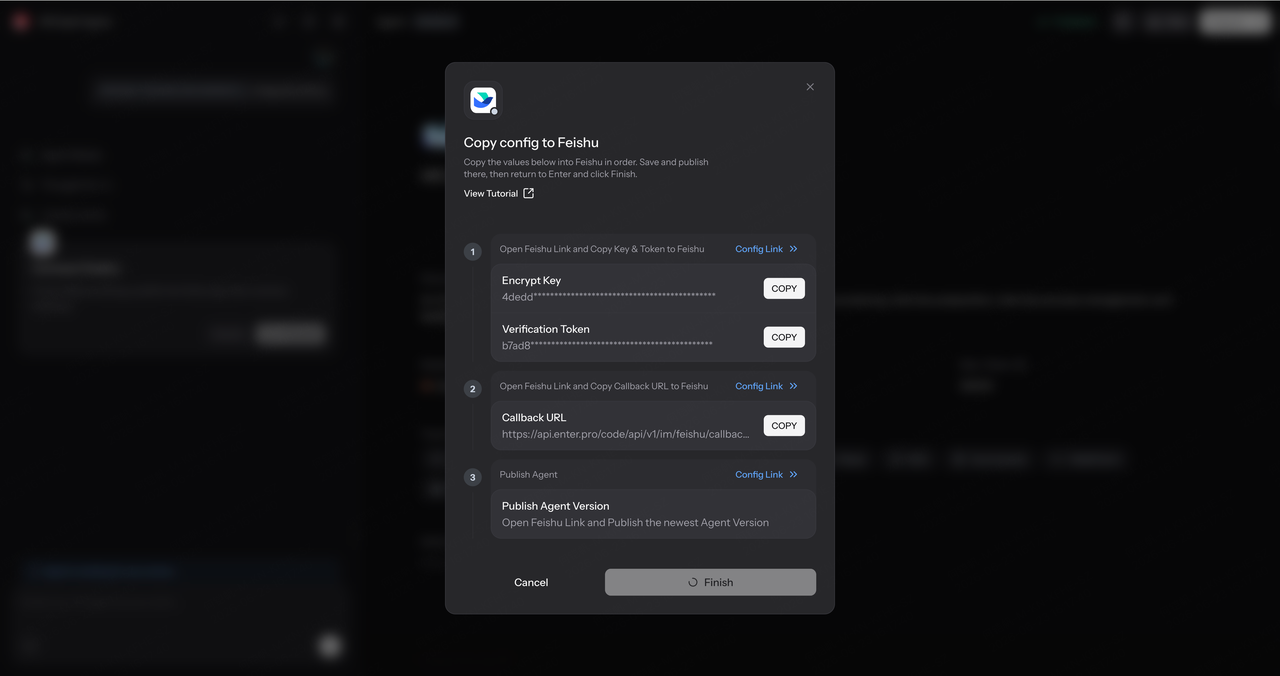
Click Connect under Feishu. Send the setup prompt and open the Feishu platform.
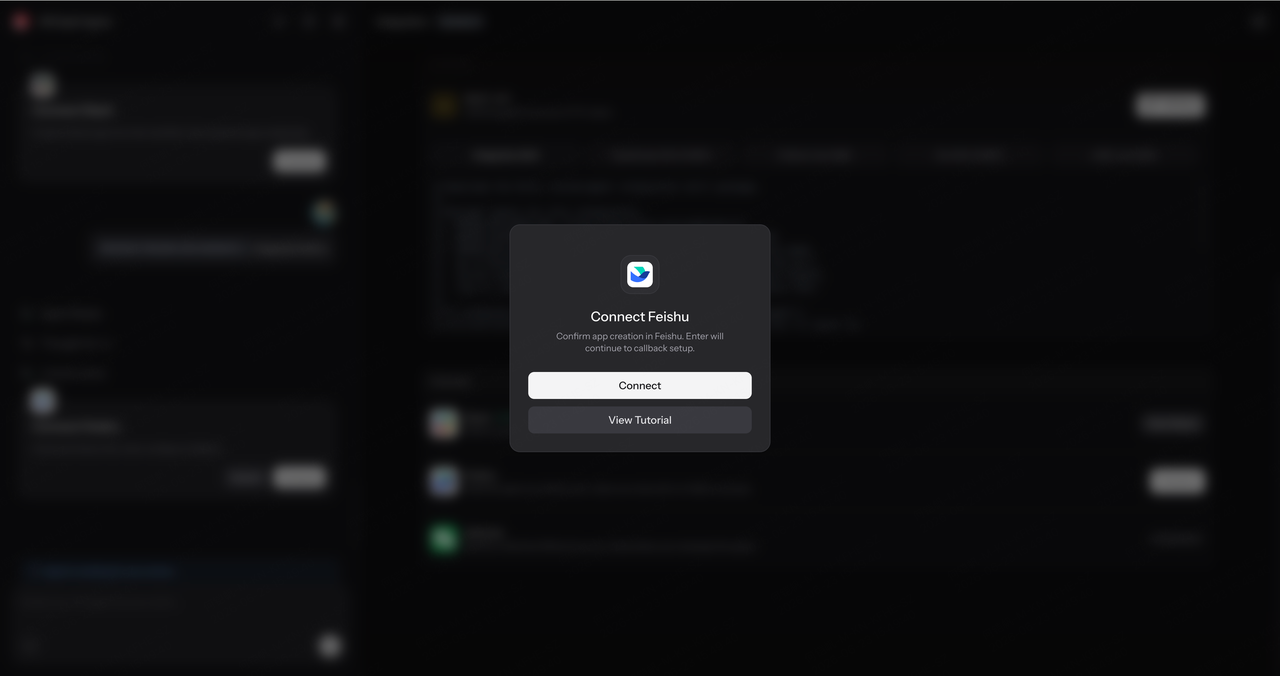
Create your Agent in Feishu, then return to Enter and follow the instructions shown on the page.
First, copy the configuration details provided by Enter and paste them into the corresponding fields in Feishu.
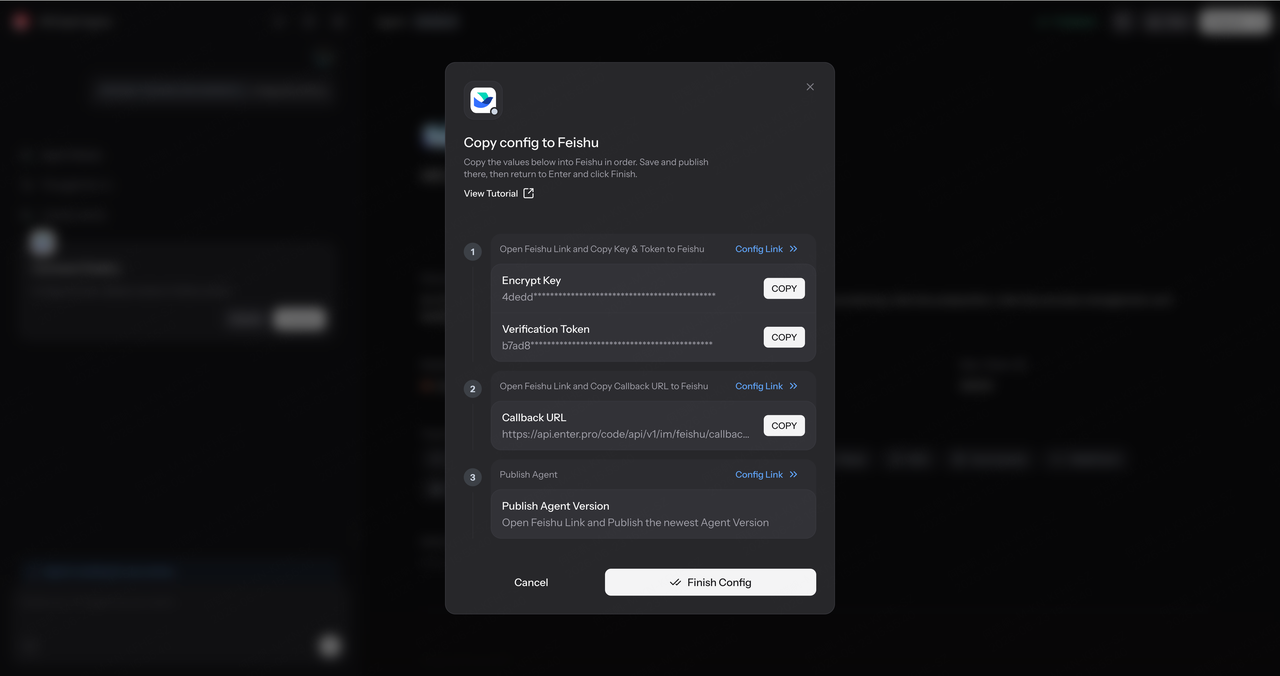
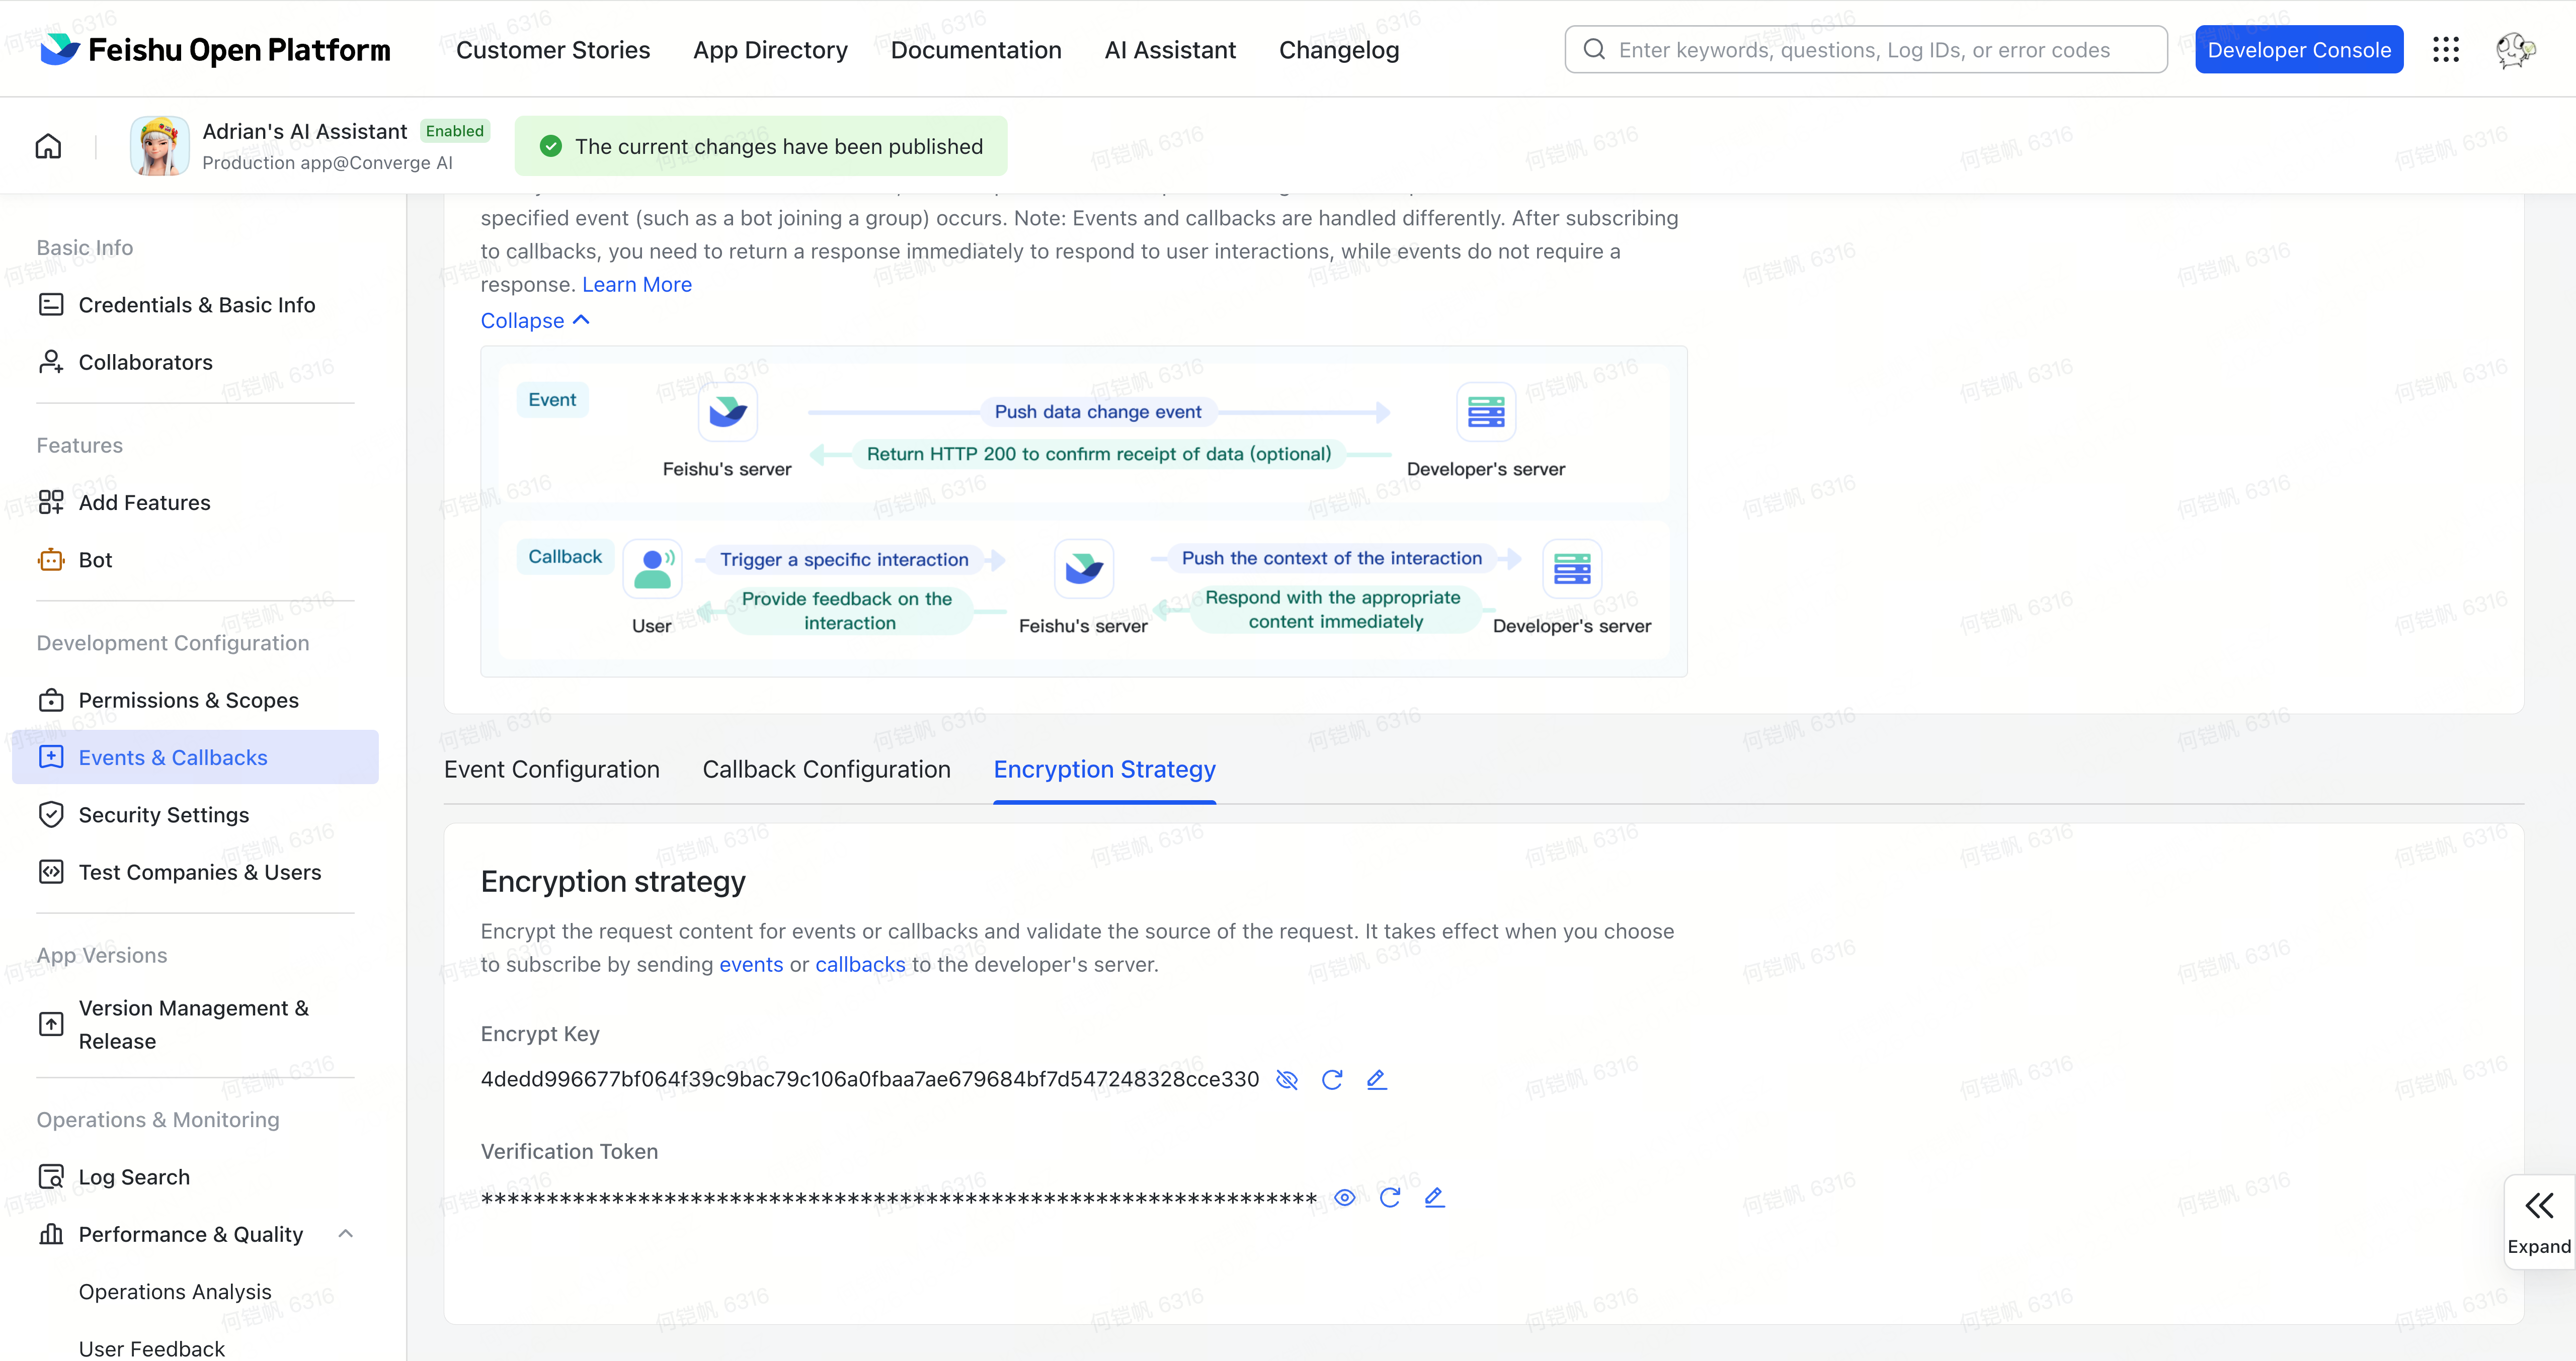
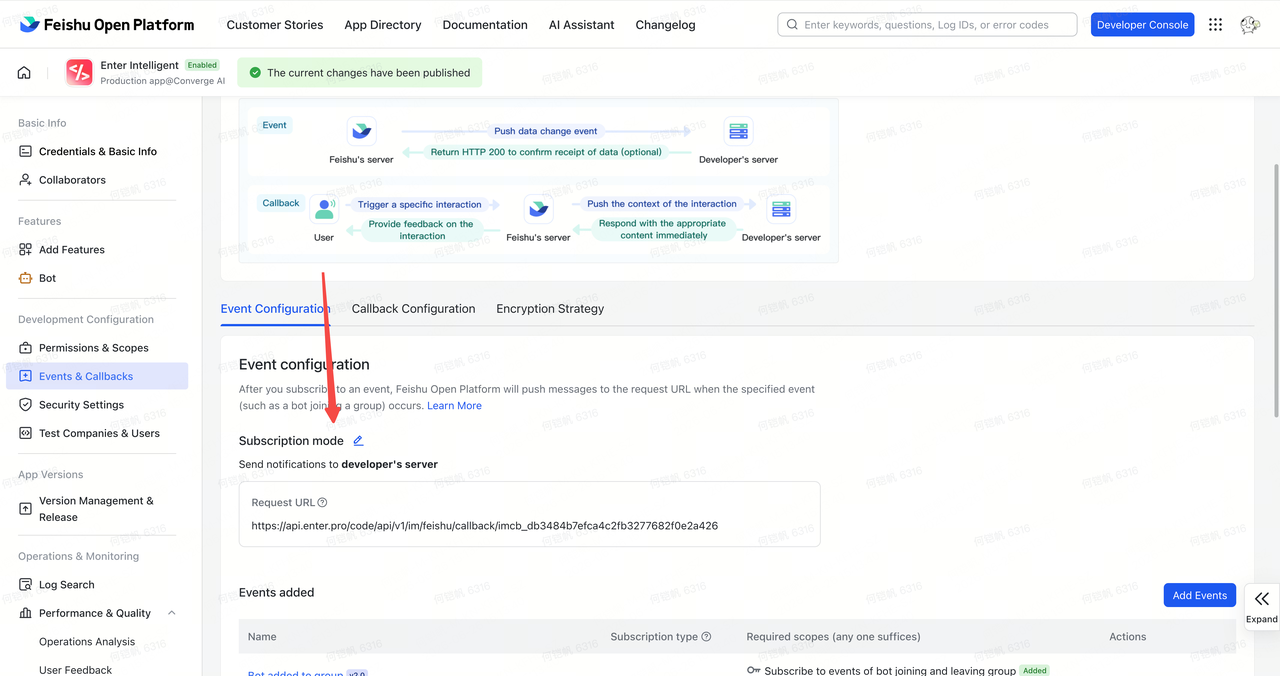
Then copy the callback URL and complete the callback configuration in Feishu.
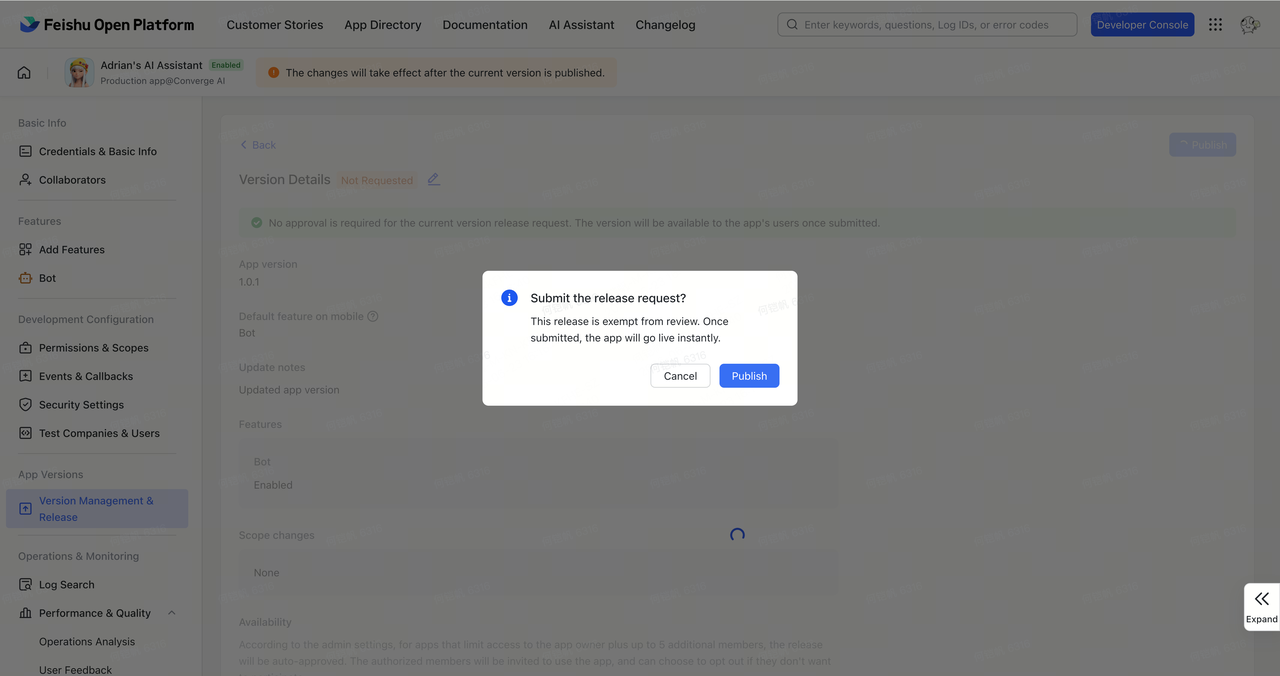
Finally, publish the Agent version.
When the page shows Feishu Connected, the integration is complete. Your Agent is now available inside Feishu as part of your team workflow.
Build Your First Agent
That is the complete process of building an Agent with Enter.
Create it from a template. Add Skills. Add Knowledge. Test the result. Publish it. Then use it as a standalone web app, connect it to an Enter website, or bring it into Slack and Feishu.
From creation to publishing and integration, Agent Builder keeps the workflow simple and guided.
Open Enter and build your first Agent.